How to Attach a Rear Bike Rack: Complete Fitting Guide
Ever wondered how to securely attach a rear bike rack to your bike? The process isn’t complicated, but it does require some attention to detail to ensure everything stays stable and safe.
By the end of this, you’ll understand the steps to fit your rack properly and confidently. Keep reading for a clear, step-by-step guide to get your bike ready for extra cargo.
Is Your Bike Even Compatible With a Rear Rack?
Most bikes can accommodate a rear rack if they have the right mounting points. Check for threaded eyelets near the rear axle and on the seat stays, as these are essential for secure attachment. Many touring and commuter bikes come with these eyelets built in, providing a stable, integrated connection. The frame material also influences what types of racks are suitable—steel and aluminum frames typically handle standard racks well, while carbon frames require more careful selection to avoid damage. If your bike lacks eyelets, clamp-on racks are an option, but they tend to be less sturdy and may not carry as much weight. The aesthetic of the rack can matter too; a sleek black rack suits modern bikes, while a silver one pairs well with classic touring bikes. Always verify your bike’s mounting points before purchasing to ensure compatibility and a safe, clean installation. For those seeking a versatile option for transporting gear, top garden carts with seats offer a sturdy alternative for heavy loads around the yard. When comparing load capacity and stability, a well-designed cart can often outperform a rack for bulky items, yet garden cart reviews highlight the importance of wheel quality and frame durability. For beach use, large wheels are critical for navigating sand without sinking or getting stuck.
Tools You’ll Need for Rear Rack Installation
To install a rear rack successfully, you’ll need several essential tools. Start with a full metric hex-key set, typically including 4 mm and 5 mm sizes, which cover most fasteners. A 3 mm hex key can handle smaller fasteners. A torque wrench is crucial; it allows you to tighten bolts to the correct tension, usually around 5 to 8 newton-meters, preventing damage from over-tightening. An open-end or adjustable wrench, often in 10 mm size, helps turn nuts on P-clamps and axle hardware. Just as a furniture dolly needs a stable base platform to support heavy loads without tipping, your bike rack requires a similarly solid mounting foundation to prevent shifting during rides.
Pliers are useful for holding nuts steady during tightening, while cable cutters trim zip ties securely. If your rack material varies, you might need spacers or washers for proper alignment. Applying grease or anti-seize compounds reduces the risk of bolt seizure, especially when dealing with metal components. Thread-locking compound secures hardware that experiences vibration, ensuring fasteners stay in place. Finally, keep a rag handy to clean threads before tightening, which helps achieve proper torque and prevents dirt from causing issues. To make the repair last, always check for common failure points like loose bolts or worn axle threads before final assembly.
Prep the Bike for Easier Rack Access
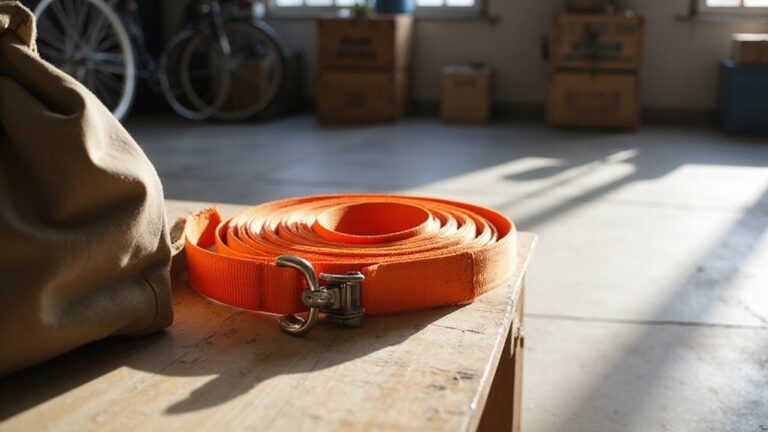
To make rack installation easier, start by confirming your bike’s compatibility. Check your frame material—aluminum, carbon, or steel—as some racks require specific mounts or adapters. Examine the rear dropout eyelets; ensure they are threaded or eyelet-compatible for mounting hardware. Measure clearances around disc brakes, fenders, or wide tires to prevent interference once the rack is installed. Ensure the bike accepts a rack and that you have threaded eyelets for secure attachment. For transport in a truck bed, similar ratchet straps can provide additional load security. If using a hitch-mounted rack, check your vehicle’s receiver hitch class to match the weight capacity of your setup. For lighter cargo needs, a collapsible folding wagon offers an alternative hauling solution with easy storage.
Remove the rear wheel to expose mounting points and stabilize your bike using a repair stand or by flipping it upside down. Clear any obstructing components like rear brakes or derailleurs, and set them aside safely to avoid damage. Thoroughly clean the mounting surfaces, inspecting threads for damage or paint buildup that could affect secure attachment.
Apply paint protection tape where the rack will contact the frame. This protects the paint from scratches during installation and use. Pre-fit the rack loosely without tightening hardware fully. Check that the rack reaches all mounting points without forcing, leaving adjustments possible. Keep the work area open and clutter-free to allow repeated access for fine-tuning your setup.
Position and Align the Rack on the Frame
To position and align the rack correctly on the frame, start by loosely mounting it so the lower legs sit at the rear dropout eyelets. Ensure the platform is over the wheel’s centerline and match the lower mounting points on each side to keep the rack centered. Verify that the platform remains level and parallel to the ground to prevent uneven load handling. When lifting the rack into place, use a leg lift method to avoid straining your back while you align the mounting points.
Next, check that the upper stays attach to the seat stay eyelets without twisting and that there is adequate clearance around the tire, frame, and panniers. Protect your bike’s frame and paint finish by using rubber shims or protective tape where the rack contacts the frame. Consider a Radio Flyer canopy if you need similar weather protection for your wagon. The same attention to secure mounting that defines top-rated retractable ratchet straps also applies to ensuring your rack stays firmly in place during use.
Adjust the angle of the lower mounts and upper stays until everything sits straight, with the deck flat. Do not fully tighten the bolts yet; instead, confirm the rack does not rub against the tire or frame. Once properly aligned, tighten all mounting bolts securely.
Tighten Every Bolt the Right Way
To ensure your rear rack is securely mounted, tighten all bolts to the manufacturer’s recommended torque specifications. Begin by hand-threading each fastener to prevent cross-threading, then gradually tighten them in small, even turns. Use a torque wrench that matches the bolt size and shape, and keep washers and locknuts in the specified order. Common torque values range from 4 Nm to 23 Nm, depending on the rack design—always refer to your guide. Applying a small amount of thread-locking compound on bolts subject to vibration can help, but never rely on it instead of proper torque. Allow the compound to cure before riding. After tightening, perform a safety check by confirming every mount reaches its specified torque, inspecting for gaps, and retorquing after your first loaded ride or trip. During installation, check mounting hardware alignment to ensure the hitch receiver and rack are properly seated together as outlined in compatibility guides. For heavy loads, consider using ratchet straps for mattress transport to further secure cargo and prevent shifting during transit. For additional stability, a yard cart designed for lawn mower towing can be used if the rack supports trailer-style attachments.
Fix Common Clearance Problems Now
To fix common clearance problems, start by adjusting your panniers as far rearward as possible to prevent heel strike from short chainstays. Larger shoes can worsen this issue, so reposition hooks on the bags to slide them back. Next, check your tire pressure—keeping it at an appropriate level reduces mud clearance problems between the rack and tire. If fenders conflict with other components, mount bolts from the inside-out to create more space. For crowded eyelets, replace standard screws with shorter or flat-head versions, or add washers to improve clearance. Trim rack struts or install P-clips if they come into contact with seatstays. Ensure you maintain correct tie-down angles for the cargo net to keep loads from shifting during transport. Also, ensure your helmet fits securely; a stable helmet prevents head injuries. Finally, if your rear derailleur sits too close to the rack, shift the rack backward or add soft padding to prevent contact. For mounting hardware, swapping to flat-head screws can help resolve space constraints in tight axle or dropout areas. During your final check, tighten all bolts to the manufacturer’s specifications to avoid loosening from vibration. Addressing these issues promptly keeps your setup safe and trouble-free.
Final Safety Check Before Loading Your Rear Rack
To ensure your rear rack is secure before loading, perform a thorough safety check. First, verify the rack sits flush on its mounting points with no play or wobbling. Tighten all bolts, straps, and clamps according to the manufacturer’s torque specifications—usually between 5 and 8 Nm for the main fasteners. Recheck and tighten them after a few minutes of initial tightening to prevent loosening during your ride. For a durable and stable solution, consider investing in a high-quality shopping wagon for hauling gear instead of relying solely on a bike rack.
Inspect the rack material for cracks, bends, or corrosion, paying close attention to welds and joints. Replace any damaged parts instead of attempting a temporary fix, as compromised integrity can lead to failure. Conduct a firm shake test—if the rack shifts under lateral force, it’s not properly installed. Confirm that tilt or fold mechanisms latch fully if your rack has these features. For heavier loads, a top adult tricycle may offer more stability than a standard bicycle with a rear rack.
Ensure all rear lights, reflectors, and license plates are visible and unobstructed. Make sure nothing blocks exhaust outlets or sensors, which could cause safety issues or damage. Check the weather resistance of the rack’s coating; if you notice signs of wear, treat it to prevent rust. For securing gear directly, ratchet straps for boats provide exceptional holding strength during transport. Finally, recheck all fasteners and points after your first 10 to 20 kilometers, especially after riding on rough roads or experiencing heavy vibrations. If anything feels loose or out of place, stop riding immediately and tighten it again.
Load Cargo Safely and Maintain Your Rack
Ensure your rack is securely fastened before loading cargo. Never exceed the rack’s rated capacity, which typically ranges from 25 to 45 kilograms. Keep the heaviest items closest to the frame to reduce leverage strain and improve rack durability. Organize cargo smartly by balancing weight evenly from side to side and placing heavier loads lower to lower the center of gravity, enhancing stability.
Use proper straps and hooks, inspecting them for fraying or cracking before each ride. Make sure fasteners are tightened securely to prevent shifting during transit. Regularly wash the rack with mild soap to remove grit and salt that can cause corrosion. Lubricate moving parts periodically to keep everything functioning smoothly. Additionally, inspect bolts and joints twice a year for signs of wear or damage and replace any compromised components immediately. When not in use, remove the rack and store it in a dry location to prolong its service life.
Test Ride and Recheck Bolt Tightness
After installation, perform a test ride to ensure the rack remains stable and does not rattle or shift. During this short ride, gently bounce the bike to help reveal any hidden play or looseness. Check all mounting points for movement, ensuring nothing shakes or rotates unexpectedly. This initial ride provides a vital opportunity to confirm the rack’s stability before regular use.
After completing the test ride, recheck and tighten all bolts and fasteners. Most rack manuals recommend a recheck after approximately 50 kilometers (about 30 miles). The vibrations from riding can loosen hardware over time, making regular bolt maintenance essential. Inspect all attachment bolts, clamps, and adjustment points for looseness or movement. Listen carefully for rattles or noises that indicate play.
Use a torque wrench if your rack’s manual specifies torque values. Tighten all bolts to the recommended settings; do not rely solely on force. Over-tightening can damage the rack or mounting points, so follow the specified limits closely. Regular bolt checks are especially important before long or demanding rides to maintain secure attachment and safety.