DIY Kayak Roof Carrier: Cheap Rack Build That Works
Looking to save money while transporting your kayak? Building a DIY roof rack for under $100 can work just as well as pricier commercial options.
With some foam blocks, straps, and a little know-how, you can secure your kayak safely on your car’s roof.
Below, you’ll find simple, step-by-step instructions to create a sturdy, reliable carrier that won’t break the bank.
Why Build a Cheap DIY Kayak Roof Carrier?
Because a commercial kayak carrier typically costs between $249 and $280, you can build a DIY version for under $100. This allows you to cut more than half of the upfront costs, making it a budget-friendly alternative. Despite the lower price, your DIY rack can match performance by choosing durable materials like strong wood or metal that won’t dent your kayak or fail during transport. You also gain control over the rack’s appearance, allowing you to customize the finish to match your vehicle’s roof for a sleeker look. This approach ensures a perfect fit for your roof width and bar spacing, eliminating common compatibility issues with store-bought options. Additionally, a wider support surface helps prevent hull dents, and you can incorporate loading aids for easier handling. Mounting the rack only when needed also reduces aerodynamic drag, enhancing fuel efficiency during travel. Similarly, choosing the right moving equipment is crucial, and using top furniture dollies can make the transport process much smoother and safer. For those who also need to haul gear to the launch site, a rolling cooler cart can help transport heavy loads across uneven terrain. Before finalizing your DIY rack, perform a thorough safety check of all fasteners and straps to ensure secure roof mounting.
Checklist: Foam, Straps, and Rope for the Build
To secure your kayak effectively, you need at least two 12-foot cam straps, not ratchet straps. Cam straps are gentler on fiberglass hulls and easier to tighten snugly without risking cracks. Use these straps to hold the kayak down over foam blocks, which should be closed-cell foam blocks for durability and better compression resistance. Unlike a dolly, which uses a flat platform for moving boxed items, a hand truck provides vertical support for top-heavy loads similar to how your straps balance tension on the kayak. For stairs, a quality dolly relies on a curved stair climber design to maintain that same vertical balance, which is a key feature to look for in top-rated moving gear. When choosing your canopy for other outdoor gear, look for a durable canopy that offers UV protection and water resistance for added value.
Wrap each strap over the kayak and under the roof rack crossbar, then bring the end back to the buckle. Position the buckle beside the crossbar for easy access and balanced tension. Tighten the straps until they are snug but not excessive—over-tightening can damage the hull. After securing, tie off any loose ends to prevent flapping.
Finally, test the kayak’s stability by pushing gently on it—if it shifts or slides, tighten the straps further. Recheck the tension after your first drive, as settling and shifts can happen quickly. Properly secured and tensioned straps will keep your kayak stable at highway speeds and protect your gear during transit.
Build the Foam Block Carrier in 10 Minutes
To build the foam block carrier quickly, start by placing two high-density polyethylene foam blocks at least 60 cm apart, aligning with your kayak’s contact points. The kit includes two foam blocks with an angled, hull-shaped profile designed to compress and fit various kayak hulls, creating a buffer between the kayak and vehicle roof. Proper spacing ensures the load distributes evenly across the roof, preventing damage to both the kayak and vehicle. The foam material offers excellent durability, compressing slightly to cushion the hull without losing shape over time. Similar to a DIY bike dog trailer, the maximum load capacity depends on the quality of the mounting straps and the foam’s ability to hold the hull without shifting. For a similar cost-saving approach to a DIY tow hitch, using quality straps and foam can significantly reduce expenses compared to a pre-assembled roof rack. Position your kayak directly on the blocks, centering it so the weight is balanced across both contact points. For heavier kayaks, using a dolly with heavy duty wheels can help move the boat from storage to the vehicle. Double-check the alignment—adjust the blocks and the kayak as needed until everything sits perfectly. This simple setup can replace a hard rack for short trips, providing a stable foundation in just minutes. Remember, the key factors are material durability and accurate positioning—get those right, and you’re all set for a secure transport.
Secure the Kayak With Cam Straps and Bow Lines
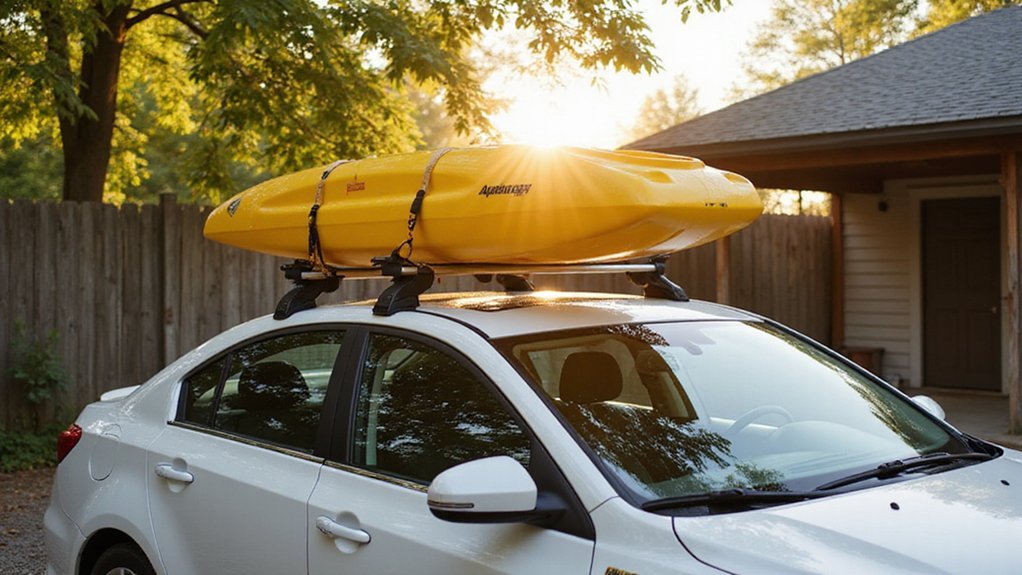
To secure the kayak with cam straps and bow lines, start by positioning foam blocks and centering the kayak on your roof rack. Use two cam straps, each about 12 feet long, as your primary roof-retention system. Run each strap over the hull and under the crossbar, then feed them back into the cam buckle. Position the buckle a few inches above and to the side of the crossbar for easy tension checks. Ensure the webbing remains flat without twists to distribute load evenly and avoid hull damage. Tighten the straps until the kayak is snug but not deformed; it should not shift side to side when pushed by hand. This is similar to checking for side-to-side movement when repairing a flat tire to maintain balanced pressure.
Next, add bow and stern lines as secondary tie-downs. Use non-stretch rope, securing the front line to a solid metal anchor like a tow hook, and the rear line to a hitch point. Tighten these lines until snug, paying attention to prevent pulling the kayak forward or backward. After installing the lines, recheck the tension on both cam straps to make sure they are even. Using DIY moving straps can save significant money compared to commercial kits for similar heavy lifting tasks. Finally, perform a shake test—your kayak should move and sway with the vehicle, not independently. For beach trips, a big wheel wagon helps transport gear over soft sand without getting stuck.
Know the Limits: When a DIY Soft Rack Isn’t Safe
Even a perfectly installed DIY soft rack can become unsafe if you push beyond its real limits. Your vehicle’s roof load capacity determines the safety threshold. A soft rack should rest on approved roof load points, not unsupported sheet metal, which can bend or warp under weight. Ignoring load limits can cause roof deflection, risking damage to your vehicle even if the rack appears fine. Remember, your vehicle’s roof rating is the true maximum, not the rack’s advertised capacity. For reference, the TIROL Car Soft Kayak Rack has a load capacity of 60 kg, which is far above the safe threshold for most DIY soft rack setups. Most DIY soft racks become questionable above 50 pounds; exceeding that increases stability problems and rollover risk. Any load near or above this weight requires heightened caution. At highway speeds, wind pressure and vibrations intensify, making loose racks more likely to come loose or shift. Even the best-reviewed commercial options, like those top ratchet straps for trucks, can fail if used on a roof that isn’t rated for the load. Similarly, when attaching any load, you must perform fitment checks to ensure the mounting points are compatible and secure. If you cannot verify your roof’s strength from your vehicle manual, treat your setup as unsafe. Always check the performance ratings of your straps, as top-rated models are designed for specific load ranges and durability. Know these limits before you drive to prevent accidents or damage.
Upgrade to a PVC or Wooden J-Cradle for Highways
J-cradles crafted from PVC or wood provide a significant upgrade in stability for highway travel. PVC J-cradles are lightweight and resistant to corrosion but can become brittle over time when exposed to UV light or cold weather. To ensure longevity, choose UV-resistant PVC and store the cradle out of direct sunlight when not in use. Wooden J-cradles offer exceptional strength and durability, but moisture protection is essential. Applying a sealed, weatherproof finish helps prevent rot and warping. Regardless of material, use corrosion-resistant fasteners and padded hull contact points. These elements prevent rust and hull abrasion. Proper load distribution is crucial: the cradle should support your kayak evenly across a rigid base with at least a 24-inch crossbar spread. Securing the kayak with at least two straps directly to the cradle, along with bow and stern tie-downs, minimizes movement during highway vibration and wind. Regularly check and tighten all straps after each drive, as vibration can loosen fittings. This low-cost approach avoids welding and specialist tools to keep the build accessible. Your setup should support the kayak as a single, stable unit, similar to how a wheelbarrow’s design evolved for balanced load distribution over rough terrain. For added peace of mind, pair your straps with high-quality clips that offer a secure, rust-resistant grip.
Avoid These Mistakes That Damage Your Kayak
To keep your kayak in good condition, avoid common mistakes that can cause long-term damage. Never slide it directly across a bare roof, as this can scratch the paint and lead to stress cracks over time. Always support your kayak with padded supports instead of hard edges that can gouge or deform the hull. Be careful not to over-tighten straps; doing so can crush polyethylene hulls or distort composite materials. Ensure that the support placement targets sturdy sections of the hull, as placing supports on weak points can create high-pressure spots that cause warping. Also, always use bow and stern lines—without them, your kayak can shift during transport, possibly damaging the windshield or hatch. Avoid leaving your kayak strapped down in heat or direct sunlight for extended periods, as polyethylene softens under high temperatures. To prevent contact with antennas or roof edges, check your vehicle’s compatibility and carefully position your kayak. When shopping for a cart to move the kayak to the water, consider looking for large wheels for beach carts to make the trip easier over sand. Similarly, check the wheels on your cart for common failure points like worn bearings or cracked hubs to ensure they roll smoothly over rough terrain. Keep your straps in good condition, center the load properly, and your kayak will remain protected and secure during transport and storage.