DIY Cooler Cart: Build a Rolling Cooler Hauler Cheap
Looking to build a rolling cooler cart on a tight budget? If you want a sturdy, portable way to transport your drinks and food without spending much, I’ve got you covered.
For under $40, you can turn scrap wood into a durable cart with simple tools.
Follow along and discover how to create a practical cooler hauler that’s easy to use and affordable, with tips to boost its look and lifespan along the way.
Build a Cooler Cart for Under $40
Building a cooler cart for under $40 is entirely doable and smarter than buying a store-bought version that costs between $80 and $200. The key is sourcing scrap wood from your garage or a local renovation site, which can cut your material costs down to under $15. This approach not only saves money but also reduces environmental impact by reusing materials that might otherwise end up in a landfill.
With basic tools and some straightforward steps, you can complete your build in about 90 to 120 minutes. You’re in control of your budget, choosing leftovers and repurposed materials rather than expensive new lumber. This method also minimizes waste and shrinks your carbon footprint, thanks to avoiding the resource-intensive manufacturing and shipping processes associated with commercial products. For even greater convenience, consider adding collapsible folding wagon features to your cart for easier storage and transport. Building your own cooler cart proves that saving money and being eco-friendly can go hand in hand with a simple, satisfying project. For added stability, consider using a furniture dolly underneath to make rolling the cart over uneven ground much easier. When moving heavy loads, a wider wheelbase improves balance, but choosing between one and two wheels depends on whether you prioritize maneuverability or steady support on rough terrain.
Rather than using wood, some builders repurpose used bed frames and angle iron for a sturdier metal frame.
Choose Lumber, Hardware, and Locking Casters
Choose the right lumber, hardware, and locking casters. For the frame, use two 8-foot 2x4s, and for the platform, three to four 1×4 deck boards. Prioritize exterior-grade, treated lumber that resists moisture from ice, rain, or spills to ensure durability outdoors. When selecting hardware, opt for corrosion-resistant materials like exterior wood screws and wood glue. Use three-inch screws and pre-drill holes to prevent splitting, especially in hardwoods or dense woods. Washers can be added at caster mount points to distribute weight evenly and reduce stress on the wood. Before cutting lumber, measure the truck bed to ensure the cart fits securely within its dimensions. For a heavy-duty build, consider whether the cart will need to handle a tow rating equivalent to a larger receiver hitch for maximum load stability.
For mobility, select four swivel casters for smooth maneuverability. Place two locking casters on one end to provide stability, or use four to prevent the entire cart from moving. Calculate the load capacity by dividing the total weight by the number of casters, then apply a safety factor by removing one caster from the divisor to ensure safe usage. Mount each caster near the corners of the base for better balance. Pre-drill holes to align the casters precisely and avoid misplacement during installation. This setup ensures your cart is sturdy, mobile, and capable of supporting substantial weight safely, and for the most secure fit, pre-drill holes to align the casters precisely and avoid misplacement during installation.
Measure Cooler Length & Width, Then Add Clearance
Measure the cooler’s length and width at its bottom base, not the sloped sides. Use these measurements since they define the footprint your cart must support. Focus solely on this bottom rectangular area, as tapering sides above do not impact the frame size. Record these dimensions in a consistent order, either Length by Width or Width by Length, to keep measurements clear.
Next, add at least 1 inch of clearance to each side of the measured dimensions. This extra space prevents the cooler from binding during insertion or removal, especially if it has rounded corners or molded handles. The goal is a loose fit, not a tight or friction fit, to minimize wear over time. If your cooler has thick insulation, consider adding an additional quarter to half inch for extra room. Measure from the bottom base upward, avoiding the lid, to ensure the true rectangular profile determines your opening size. Double-check your measurements before cutting: undersizing the platform will lead to a frustrating squeeze when placing or removing the cooler. For a durable support structure, consider studying the load capacities of piano dollies to inform your build. Sharing equal clearance on both sides ensures the cooler drops in smoothly without forcing or jamming. This same principle of precise sizing applies when selecting a yard cart for lawn mowers to ensure the attachment fits securely without binding. When purchasing top ratchet straps to secure the cooler, look for models that offer both strong performance and reliable quality for long-term use.
Cut 2x4s and Square the Base Frame
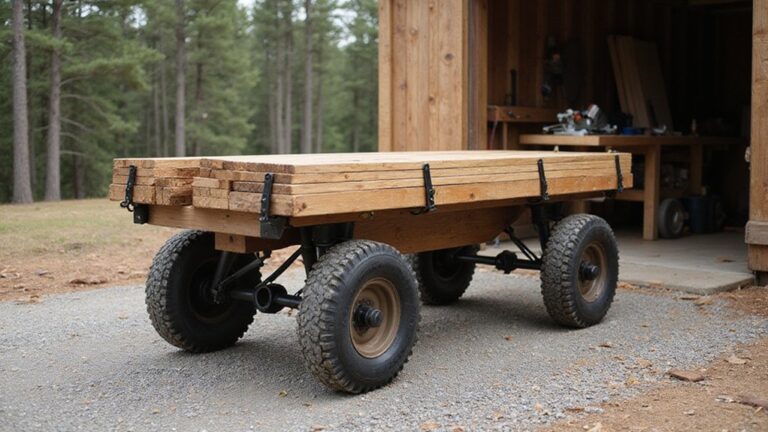
To ensure your base frame is square, start by cutting two long rails and matching cross members from your 2x4s, making sure opposite sides are equal in length. Lay out the pieces on a flat surface, arranging them in a rectangle to easily spot any length discrepancies before fastening. Use framing tools and clamps to hold the joints flush and maintain alignment as you work.
Next, measure diagonals from corner to opposite corner. When the measurements are equal, the frame is a true rectangle. If they differ, adjust by shifting the longer corner inward until both diagonals match. Confirm right angles with a framing square or apply the 3-4-5 method for accuracy. Only secure the joints with screws after verifying the diagonals and angles, and keep the frame flat throughout to ensure the cart will roll smoothly later. For beach trips, a sturdy base like this can rival the capacity of a top beach wagon without the high cost. Consider how a bed extender could similarly secure long loads on a truck. This ladder-style base, cut at 16-inch centers, provides the structural support needed for heavy loads. For easier shopping, you might compare top garden carts to see which features best suit your project.
Screw Down Top Slats With Half-Inch Drainage Gaps
Screw down the top slats with half-inch drainage gaps between each board. Begin by securing the first slat to the frame, then space each subsequent slat half an inch apart using spacer blocks or scrap strips for consistency. Each slat should be fastened with corrosion-resistant screws driven in evenly so they sit flush and maintain uniform gaps. These gaps promote quick water runoff, preventing pooling and reducing rot. They also enhance airflow beneath the slats, which speeds drying after rain or cleaning. Check your final gap size after installation, especially if the lumber shrinks as it dries, to ensure consistent drainage and aesthetic appearance. Proper spacing and secure fastening will prolong the life of your cart top in outdoor conditions.
Pre-Drill Every Joint to Prevent Split Wood
Pre-drilling every screw hole is essential to prevent splitting the wood and ensure a durable cooler cart frame. Match the pilot hole size to your screw and type of lumber. For a #8 screw in softwood, use a 5/64-inch drill bit; in hardwood, step up to 3/32-inch to reduce pressure. A #10 screw requires a 3/32-inch hole in softwood and a 7/64-inch in hardwood. Drill straight and at a slow pace, especially near the ends of boards where splitting is more likely. Clamp narrow stock before drilling to minimize vibration. Always use pilot holes when working across the grain; without them, the wood is prone to cracking. Test on a scrap piece first to check the fit. For hauling the completed cart, consider top cargo boxes that attach to a trailer hitch for easy transport of extra gear. Reading top cargo strap reviews can help you select the best tie-downs for holding the cart together during use. Cam buckle straps can also be used to secure the cooler firmly to the cart during transport. Proper pilot hole sizing keeps your cooler cart strong and split-free.
Attach a 2×4 Handle for Push or Pull
Attach a 2×4 handle to your cooler cart with the grip positioned between 35 and 38 inches above the floor. This height allows for both pushing and pulling without stooping, keeping your spine neutral and reducing back strain. Diagonally brace the 2×4 into the cart frame to prevent flexing under load, ensuring stability and strength. Keep the grip thickness between 2.5 and 3.8 centimeters for comfortable grasping, and provide at least 20 centimeters of gripping length to accommodate different hand sizes. Proper placement and secure bolting of the handle enable smooth maneuvering of your cooler cart while maintaining good posture and minimizing wrist angles. For secure transport of your gear, consider how trailer-mounted carriers provide added stability and weight distribution when moving heavier loads over longer distances. Applying similar principles from shoulder dolly moving straps can help coordinate lifting with a partner to reduce strain on the lower back.
Bolt Locking Casters at Each Corner
For a sturdy and reliable cart, support each caster with a total lock rating that covers the weight of the cooler, ice, drinks, and hardware. Divide the full weight by four to find the load per caster, then add a safety margin of 25 to 30 percent to account for movement and uneven load. Never exceed 80 percent of each caster’s published static load rating to ensure durability and safety. Mount each caster directly into a flat, reinforced base that matches the cart’s mounting pattern, and always use washers on fasteners to prevent pull-through over time. To match the performance of top heavy duty utility carts, ensure your caster load rating and wheel material are chosen for the specific task. When selecting casters, also consider the total load capacity to handle heavier family loads and gear safely.
Wheel material choices influence mobility and floor wear. Softer compounds roll quietly on tile or concrete but tend to wear faster, while harder materials withstand debris better but can scuff floors. For indoor use on smooth surfaces or carpets, 4 to 5-inch wheels provide good maneuverability. Larger wheels are preferable outdoors where obstacles are present. Regularly check and clean swivel bearings to remove grit and keep the wheels rolling smoothly. Tighten fasteners periodically to prevent wobbling or loosening. Lock all four brakes when loading the cart to keep it stable during use. To keep the cooler from shifting during transport, the strap tension and secure tie-down points on your cart should mimic the cinching reliability found in top-rated cam straps.
Check for Wobble Before You Load the Cooler
To check for wobble before loading your cooler, start by placing the cart on a level surface. Ensure all four casters touch the floor simultaneously; a slight lift at one corner can cause wobble under load. Slide a business card under each caster—if it slides freely, that indicates uneven contact. This points to caster misalignment or frame twist, which should be corrected before loading.
Next, spin each wheel by hand to look for side-to-side play, a sign of worn bearings or loose hardware. Wiggle the caster housing vertically and laterally to detect hidden looseness. Inspect all bolts, brackets, and welds, tightening anything that shifts or clicks during light rocking. Proper frame stability depends on rigid joints.
Finally, load a light test weight evenly across the cart. Push from each side and observe the wobble. If the same wheel position causes the wobble, the assembly is likely misaligned; if the wobble moves with the load, the frame may be bent or twisted. Correct any issues before adding full weight.
Cheap Upgrades Under $5: Paint, Rope, and Padding
Applying paint is a simple way to upgrade your cooler cart under $5. Disassemble the cart, remove any rust, and then apply thin, even coats of flat black spray paint. Using multiple light coats helps avoid drips and ensures a smooth finish. For better adhesion and durability, spray a single can of primer before painting. This step prevents peeling and maintains a clean look over time. Make sure to dry each coat completely before applying the next to achieve the best results.