DIY Kayak Cart From a Milk Crate: Cheap Build Guide
Looking for an easy way to move your kayak without spending a lot? Building a DIY kayak cart from a simple milk crate is a budget-friendly solution that works surprisingly well.
With just a few supplies from the hardware store, you can create a sturdy, lightweight carrier that handles sand or gravel wheels and keeps your kayak secure.
Below, you’ll find all the steps and tips to craft your own reliable kayak cart ready for any terrain.
Grab a Milk Crate and These Hardware Store Parts
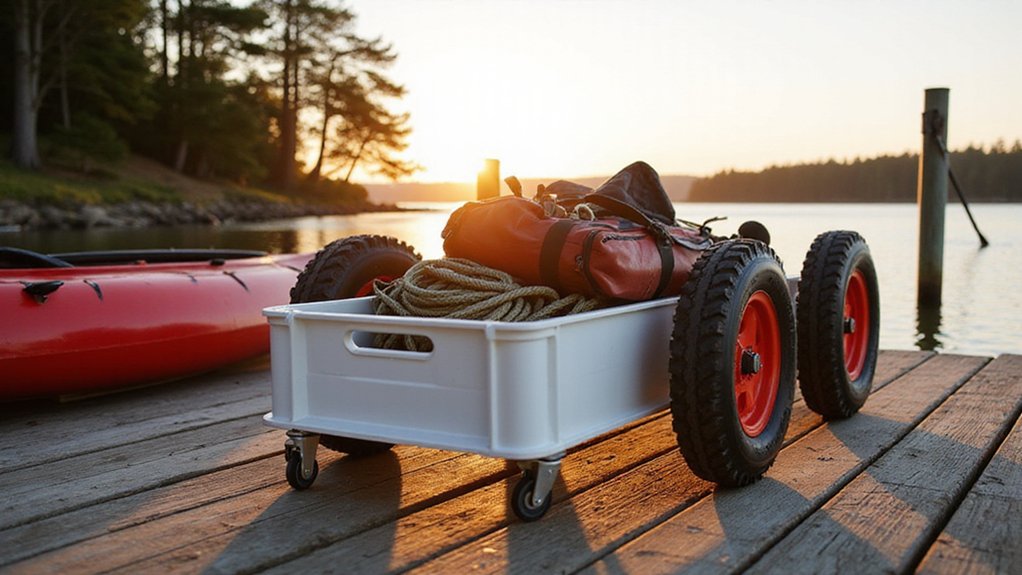
Choose a standard square or rectangular milk crate based on your gear. A square one measures about 13 by 13 inches with an 11-inch height, suitable for smaller loads. Rectangular crates are around 19 by 13 inches and also 11 inches high, ideal for longer items. Lightweight plastic is best because it’s durable and often eco-friendly, helping keep your build sustainable. Heavy-duty zip ties are your go-to fasteners—they’re cheap, strong, and versatile. Drill pilot holes through the crate walls, then thread the zip ties through to attach rod holders or accessory pouches. Small washers placed behind bolts prevent the plastic from pulling through. Use bungee cords to secure loose gear, especially when you need quick access or extra hold. Simple hardware like zip ties, washers, and bungee cords work well—no need for marine-grade materials if you keep it low-cost and functional. For heavier loads, consider adding a furniture dolly underneath to improve stability and ease of rolling across rough terrain. You can also secure the load to the dolly using cam buckle straps for a tight and reliable hold. A cart with large pneumatic wheels will handle sandy or rocky paths much better than standard casters.
Build the PVC Frame and Axle for Your Kayak Cart
To build the PVC frame and axle for your kayak cart, start by gathering your 3/4-inch PVC pipe, T-fittings, and 90-degree elbows. Cut the pipe into modular segments measuring 18, 10.5, 8, and 4.5 inches. These pieces will form the H-shaped base of your cart. Dry-fit all parts first to ensure proper alignment and enough clearance for your wheels before gluing anything permanently. For a budget-friendly project, use cheap PVC and primer to keep costs low. Before gluing, also perform a thorough safety check of all fittings to confirm they are snug and aligned, just as you would for a bike trailer attachment. Before any permanent assembly, always lay out your work area to keep components within easy reach and prevent misalignment during the installation process.
Next, drill two 5/8-inch holes into each PVC end cap to accommodate your axle bushings. Slide a stainless-steel threaded rod through the caps and the frame, making sure the axle stays centered and rotates smoothly. Test-fit the rod, then cut it to the proper length with a hacksaw. Smooth the ends with a file to prevent any rough edges. Confirm that the rod extends evenly on both sides so the wheels sit symmetrically relative to the frame’s centerline.
On each side, stack the hardware in the following order: lock nut, washer, wheel, washer, hex nut, and lock washer. Tighten each connection snugly to allow the wheels to spin freely without excessive play. Keep the frame rigid but leave enough space so your kayak fits comfortably and moves smoothly on the cart. After tightening, verify that each wheel rotates without friction against the frame, and double-check that all nuts remain secure before loading your kayak.
Attach Wheels That Roll on Sand, Gravel, and Ramps
Oversized balloon wheels with a diameter of 30 cm are ideal for rolling smoothly over sand, gravel, and ramps. Match the axle width to your hub, typically around 23 mm for a 22 mm axle, to ensure proper fit. Securing the wheels tightly is essential because loads on sand put stress on your cart during turns, risking wheel dislodgement. Quick-release systems allow you to swap wheels easily, which is helpful for different terrain or storage. When attaching the axle to the cart frame, use a trailer hitch pin to lock the assembly securely against vibration and movement. However, tie-downs and additional securing mechanisms will be necessary later to keep everything stable during heavy use, and ratchet straps provide the best tension control for that purpose. To prevent strain, apply correct lifting technique with your legs instead of your back when loading the cart.
Secure Your Kayak With Bungees and Tie-Down Straps
To securely transport your kayak, use cam tie-down straps as your primary restraint rather than bungee cords. Bungee cords tend to lack consistent tension under load and may loosen during transit. Route each strap over the hull and through solid anchor points on your cart—avoiding weak spots to prevent shifting or slipping. Keep the kayak centered on the cart to ensure even support. Tighten each strap until it is snug but does not deform the plastic hull. After rolling a few feet, recheck the tension since webbing settles, and re-tighten if necessary. Avoid using ratchet straps because they can over-crush the hull, risking damage, but for heavier loads requiring more tension, consider top ratchet straps designed for truck use. For added stability on uneven ground, attach bow and stern backup lines to strong fittings, not hardware prone to failure. Always secure all loose strap ends to prevent flapping during transport. Reserve bungee cords for light gear inside the kayak rather than as main restraints, as they cannot reliably hold the kayak securely. For extra security, you can integrate a DIY bike trailer hitch design to attach the cart behind a bicycle for longer hauls. If you plan to haul your cart across soft sand, look for a model with large balloon wheels that provide better flotation and easier rolling.
Test Your Cart for Balance and Safety Before Launch
After securing the kayak to the cart, test for balance and safety before moving toward the water. Place the cart on flat, level ground and position it directly under the hull, aligning with the kayak’s balance point near the cockpit. Gently shake the assembly to check for wobbling—if it rocks side to side, adjust the kayak’s position until it sits stable. Ensure both wheels bear roughly equal weight to prevent tipping later. Push the cart across different terrains like grass, sand, or gravel to verify smooth rolling without wheel dragging or sticking. Inspect the materials, including the milk crate and hardware, for cracks, corrosion, or damage that could compromise stability. Tighten all fittings securely. As a safety measure, stop immediately if you notice any unsafe tilt or imbalance. Re-center the load if the cart feels top-heavy or unstable. Performing this thorough check guarantees a stable, safe setup and helps prevent tipping during transport. Field tests on a muddy trail with ruts showed the cart remained mostly stable despite the rough conditions. For long hauls over uneven terrain, consider a dirt bike trailer design for its rugged wheel and frame durability. A compatible trailer attachment for a bike can also be used to tow the cart more easily over long distances. For those who plan to tow a trailer behind a bike or vehicle, understanding the difference between a mount vs tow hitch helps you choose the right setup for weight capacity and everyday practicality.
Quick Repairs When Things Break on the Trail
Quick fixes are vital when things break mid-trail because even if your cart passes a pre-launch test, issues can still occur. For strap failures, duct tape can provide a quick emergency hold, or you can replace damaged straps with Velcro ones. A cheap ratchet strap from a hardware store can stand in for a broken tie-down, and heat-sealing cut ends of straps or cords reduces fraying. Zip ties are effective for securing loose components so you can finish your carry without delay.
If you encounter wheel or axle problems, re-tighten any loose hardware on the spot. For a bent axle, adding spacers helps stabilize it, and replacing a missing retaining pin with a cord can get you moving again. Always carry spare nuts, bolts, and washers—these are key maintenance essentials. For a collapsing frame, stiffen it using short PVC sections bolted into place. To re-secure loose padding, zip ties work well; just remember to snip off excess tie tails to prevent snags. Keep a repair kit stocked with zip ties, duct tape, cord, and a multitool for fast roadside fixes. If a wheel loses air, it is often caused by a faulty valve stem core rather than a puncture.