DIY Wagon Handle: Build or Replace It Yourself
If your wagon handle is broken or worn out, fixing or replacing it might seem tricky, but it’s simpler than you think.
You can swap out a handle in under an hour using basic tools or even craft a custom one from steel tubing for heavier loads.
With just a few measurements and some straightforward steps, you’ll get your wagon back in shape.
The full process is right here to guide you through each step.
Why Your Wagon Handle Broke
Your wagon handle breaks primarily due to repeated cyclic stress, especially near bends and joints where small cracks can develop unnoticed. These points experience frequent pulling, which gradually weakens the material over time. Sudden jerks or dropping a loaded wagon cause shock loads that can initiate or worsen fractures, particularly if the handle is already compromised. Connection points such as bolts, welded joints, or rivets are often the weakest links; failure here redirects stress into the handle body, increasing the risk of breakage. Material choice also plays a critical role: wood with poor grain direction can split under stress, metal handles are vulnerable to rust and fatigue, and plastic handles may become brittle from exposure to sunlight and UV rays. Because environmental factors like moisture, cold, and Sun exposure accelerate material degradation, these issues compound over time. Choosing a handle made from a higher quality material can prevent similar failures, as seen in durable yard cart designs that withstand repeated heavy loads. Cargo bike manufacturers select materials specifically to handle repeated cyclic stress from daily hauling. Understanding these failure points helps you select a sturdier, longer-lasting replacement handle that ensures safety and durability during heavy use. Always check the load rating of any replacement option to avoid overloading the handle beyond its intended capacity, a mistake that commonly leads to premature breakage.
Tools and Materials for a Wagon Handle Repair
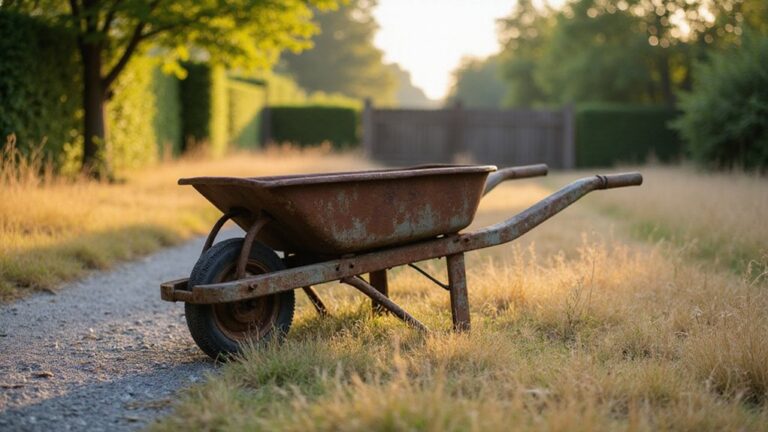
To repair a wagon handle, gathering the appropriate tools and materials first is essential. Handle material options include steel tubing for its high strength and corrosion resistance, making it ideal for heavy-duty use. Aluminum reduces weight, which helps when you need a lighter handle. Budget-friendly choices are PVC pipe or electrical conduit, suitable for custom builds on a limited budget. Fastening methods involve bolts, nuts, and slotted hex hardware to securely attach the handle to the wagon frame. Ensure handle screws match the original pattern for a tight fit. Basic disassembly can be done with hand tools, but a drill speeds up the process when replacing or converting damaged parts. Cutting tools are necessary to trim metal conduits accurately, and bending tools help shape a D-handle. Measuring tools are critical to match hole spacing precisely; avoid using rope or tape for anything beyond quick, temporary fixes, as they don’t guarantee accuracy. For those replacing a handle, the product comes with anchors and screws to secure the mounting bracket onto the frame. For heavy loads moved on stairs, a dolly with stair climbers provides similar stability and strength. When estimating material volume for a related project, remember that a standard wheelbarrow holds about three cubic feet, which helps you gauge how much fill or gravel you can transport per load. For truck owners needing extra cargo capacity, a bed extender offers a secure way to haul longer items without risking damage to the tailgate.
Measure Your Wagon Handle for a Perfect Fit
To ensure a proper fit, measure your wagon handle carefully by starting with the center-to-center distance between the mounting holes. Record this measurement in millimeters for accuracy, as this is the critical dimension. Avoid using the edge-to-edge length, which is not the relevant measurement for fitting. Next, check the fully extended handle length, which typically ranges from 52 to 79 centimeters. Confirm this to ensure comfortable pulling without overextending. Measure the tube diameter, usually 1.4 centimeters or 2 centimeters, and match the connector sizes to prevent looseness. Consider the handle material: metal provides durability, while plastic or rubber grips are lighter. Verify that the handle’s shape suits your grip and matches your wagon’s height for ergonomic comfort. When selecting a replacement, prioritize the same quality and performance standards as top-rated gear. Finally, measure twice and account for manual measurement variations of about 1 centimeter to ensure a precise fit before ordering. The replacement handle is constructed from a durable metal with black corrosion-resistant coating for long-lasting outdoor use. For proper alignment, ensure the mounting holes are aligned with compatible hardware to avoid instability. A common fitment mistake is using the edge-to-edge length instead of the center-to-center distance.
Remove the Old Wagon Handle Without Damage
To remove the old wagon handle without damage, start by identifying the fastener type—look for wood dowels, metal pins, screws, bolts, or plastic stops. Before applying force, evaluate the joint for glue, corrosion, or swelling, which can complicate removal. Apply penetrating lubricant at the handle-to-joint interface and gently tap to break any bonds. If you see an exposed pin or dowel, clamp pliers onto it and pull straight out while twisting slightly. For stubborn pins, use a punch centered on the fastener to drive it free, supporting the surrounding wood to prevent damage. When removing trapped wood dowels, drill a pilot hole, insert a screw, and pull it out with pliers. After removing the handle, clear all residue to ensure the wagon frame remains intact for the next handle installation. During this process, exercise caution with protective gloves and use a thin pry tool to lift stuck plastic components, a cautious approach prevents bending or cracking the handle’s internal locking mechanism. Always perform a final safety check on the wagon frame and attachment points after removing the old handle to confirm no structural damage occurred. If the handle’s attachment bracket is sized loosely, measure its inner width against the frame’s outer diameter, since proper measurement standards for replacement parts rely on consistent tension points to avoid future loosening. As with any mechanical installation, verify that all fasteners are tight and secure before use, just as a truck bed extender requires a final check to prevent load shifting.
Install a Universal Wagon Handle Replacement
After aligning the handle, loosely tighten the hardware to allow for final adjustments. Adjust the handle angle and reach so you can comfortably pull the wagon. Test the grip to ensure it feels natural and secure. Also, verify that the handle folds smoothly into its locked position without any frame interference. Use steel or stainless-steel connectors to resist rust if you’re working outdoors. The handle is constructed from high-quality alloy steel for durability and resistance to outdoor conditions. A typical DIY dolly build supports loads comparable to a sturdy furniture dolly. Once satisfied with the position and function, tighten all fasteners securely. A loose connection can reduce steering control and load stability, so give everything a firm tug before loading your wagon. For easy shopping, consult a comparison of top garden carts to verify your handle’s load capacity matches popular models. Choose hooks that provide a secure grip on the handle’s attachment points for reliable performance.
Build a Custom Wagon Handle With PVC or Conduit
To build a stronger and more customized wagon handle, use 3/4-inch PVC or conduit depending on your needs. For a lightweight cart, 3/4-inch PVC works well, while 3/4-inch conduit offers more stiffness for heavier loads. Start by cutting a main grip section, then attach two side pieces of 1 to 2 inches using 90-degree elbows to create leverage. Dry-fit all parts first to check the fit before cementing each joint one at a time for accuracy. When bonding PVC, ensure you apply cement and primer to the inside of fittings and pipe segments, twisting slightly for a secure full bonding capable of withstanding pulling pressure.
Drill mounting holes in the handle and secure it to the wagon with bolts and wing nuts for easy removal or adjustments. Alternatively, you can screw PVC straps to the wagon sides, slide the handle underneath, and fasten the straps over it. To improve the handle’s appearance, paint the PVC black; for better grip, leave at least a 4-inch space for your hand and align the handle mount with your natural hand height. Since conduit tends to bend easily, shape it carefully during installation. Tighten all joints securely to prevent twisting or slipping when pulling under load.
Reattach a Loose Wagon Handle With Bolts and Washers
Replace the loose handle using matching hardware—specifically bolts with the same diameter, thread pitch, and length—and appropriate washers to distribute the load. Start by backing off the nut while firmly holding the bolt to prevent spinning. Check for any stripped threads or elongated mounting holes that could impede a secure fit. Clean dirt and debris from all contact surfaces to ensure a stable rebuild. When selecting your replacement hardware, consider using furniture-grade caster wheels for improved mobility and durability. When disassembling, use a wrench and screwdriver to loosen and remove the bolt from the nut, detaching washers, nut, bolt, and spring mechanism from the handle. When reassembling, align the holes properly, slide a flat washer onto the bolt, add a lock washer if necessary, and thread the nut on by hand. Tighten until the joint feels solid, but avoid overtightening, as this can damage washers or distort the handle bracket. Finish by applying a medium-strength threadlocker to prevent future loosening, then recheck the tightness after a short period of use. For a more durable upgrade, consider replacing the entire handle assembly with one from a top-rated beach wagon that features reinforced brackets and corrosion-resistant hardware. A furniture dolly can also serve as a stable base to move heavy items while working on handle repairs.
Quick Temporary Fixes for a Broken Wagon Handle
Quick temporary fixes can get a broken wagon handle back in use quickly. Start by cleaning the handle to remove dirt and grease, which helps any makeshift repair stick better. Wrap duct tape tightly around the stub to create a thicker grip; layering it over a rope loop adds extra rigidity and comfort. You can also thread heavy-duty zip ties into a pull loop or slide a strong belt through the base to form a strap. For cracked or fractured sections, splint the damage with a ruler or similar stiff material and tape over it for support. If you need a swift grip, clamp vice grips onto the strongest part of the stem—but only for short-distance moves. For more permanent solutions, consider looking into top garden carts with comfortable, built-in seating for extended use. For a handle whose bottom portion has busted out, you can fill the gap temporarily with layered tape and a wooden block for added support. For more permanent solutions, consider top cargo nets that secure items in your SUV during transport. Finish by marking the repair spot with a marker to make future identification easier. These fixes will help you move the wagon, but keep in mind they are only temporary solutions.
Steel or Plastic Replacement Handles: Which Lasts Longer?
Steel handles generally last longer than plastic handles. Steel resists bending and breaking under repeated stress, making it suitable for heavy-duty tasks. Stainless steel also resists rust and weather, which means it performs well outdoors over time. On the other hand, plastic handles tend to crack when subjected to stress and become brittle from UV exposure. This makes them more prone to failure, especially with frequent use or harsh environments.
While steel can bend without snapping, it can still fail if the mounting points are weak. Plastic handles usually fail at pivots and fasteners, especially when exposed to sunlight. For rough terrain or frequent hauling, steel handles are the better choice. For light, indoor use, quality plastic handles can be sufficient.
Don’t overlook the attachment design; a strong handle attached to weak mounts can fail early. Match the handle material to your load and environment to ensure longevity. Although steel handles last longer, plastic options often cost less upfront. Consider your needs carefully to make the right choice.