DIY Wood Kayak Cart: Simple Plans With Basic Tools
Thinking about building your own kayak cart? A simple wooden frame can make transporting your kayak easier without breaking the bank.
Whether you want a lightweight design or a rugged set-up for tough terrain, understanding the basics will get you started on a sturdy, customized cart.
Keep reading to learn the essential steps and measurements you shouldn’t overlook.
Plank vs. Box: Which Kayak Cart Frame Is Right for You?
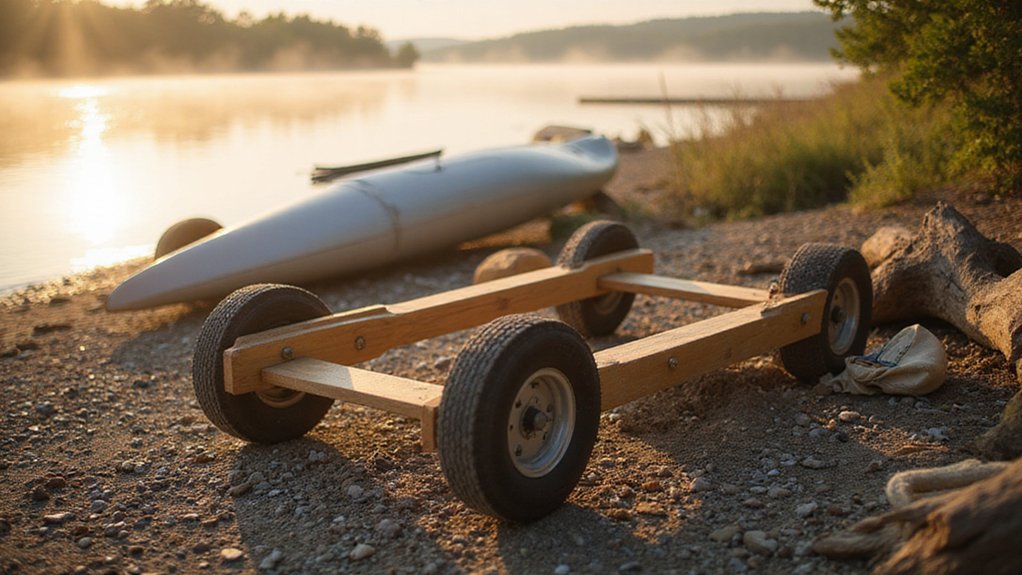
A box frame kayak cart is generally better for heavier loads and rough terrain. Its rigid crossmembers distribute weight evenly and resist racking, providing a stable, long-lasting platform. This design is ideal if you often carry heavy kayaks over uneven ground or longer distances because it helps keep your boat centered and balanced. For example, the same rigid construction that makes collapsible folding wagons durable for hauling gear also supports a box frame kayak cart under heavy loads. When securing your kayak to the cart, you can use ball bungee cords to hold the hull firmly in place without damaging the surface. Before loading, you should perform a final safety check to ensure all straps and attachments are secure.
In contrast, a plank frame is simpler and lighter, with fewer joints and cuts. It’s a good choice for shorter carries, quick trips, and easy storage. While less durable under heavy loads, its streamlined design makes it more agile and easier to maneuver. If your trips involve smooth surfaces and lighter kayaks, a plank frame might suit your needs better.
Pick the Right Wood: Plywood vs. Ash Plank for Your Cart
Plywood generally offers a better balance of ease and durability for kayak carts. Its cross-laminated layers provide strong structural support, distributing loads evenly so you don’t have to worry about weak spots. Flat panels make cutting and assembly straightforward, though ignoring the grain can cause edges to splinter. Plywood’s lighter weight makes hauling over sand or pavement easier, reducing fatigue during transport. To keep the load secure during transport, consider using ratchet straps for mattress safety and security. For the dolly itself, selecting top straps with strong webbing ensures the kayak remains stable on uneven terrain. Comparing quality and performance across different webbing options helps identify the most reliable straps for securing heavy loads.
Ash planks, on the other hand, are denser with a density of about 680 kg/m³. This density gives you superior impact resistance and better screw-holding capability, making it ideal for frame rails that need to withstand knocks. The straight grain of ash also makes it easier to work with for precise joints, but it’s heavier and more difficult to cut with basic tools. While ash offers increased toughness, it comes with added weight and effort during construction. Combining plywood for panels and ash for reinforcement, both sealed against moisture, provides a practical approach to building a durable, manageable kayak cart.
What Should You Measure Before Cutting Wood?
You should measure the kayak and cart components precisely before cutting wood. Start by measuring the kayak’s hull width at the contact point with the cart, not the widest part. Typically, this is 16 to 24 inches below the cockpit. Accurate measurement here ensures a snug fit to prevent slipping and reduce material stress. For additional guidance, reviewing top garden carts can help compare wheel and axle designs that improve stability. Similarly, understanding swivel caster benefits can inform your choice of wheels for better maneuverability on uneven ground. For example, a furniture dolly design can be adapted to provide a wider, more stable base for the cart.
Next, verify the overall length of the cart, the axle span, and wheel clearance. Include extra space for hardware such as washers and cotter pins. Measure support height from the ground to the kayak, taking into account the wheel diameter and ground clearance. If the cart needs to stow inside your kayak, measure storage dimensions carefully. The gap between the two posts determines the cut length for the storage piece to ensure proper fit within the frame.
Double-check all measurements with a tape measure for accuracy. Precise measurements now simplify later refinishing and eliminate wasted wood, preventing frustration and costly errors.
Cut and Shape Your Kayak Cart Frame to Fit Your Hull
Once you’ve taken precise measurements, you need to cut and shape your kayak cart frame so the cradle matches your hull’s unique contour. Focus on hull support by creating crossbar cutouts that conform to your boat’s bottom shape—using a deep V for deep-V hulls or a wide, low-angle V for flat or tunnel-shaped hulls. This ensures pressure is evenly distributed, which helps prevent cracks in plastic over time. To add frame flexibility, make adjustable crossbars or reconfigurable cutouts, allowing you to adapt the frame to different kayak shapes later. Shape the arms symmetrically so the hull sits level when supported, and test-fit your design with cardboard templates before cutting the wood. Continue trimming and testing until the cradle holds the hull snugly without forcing it into a bend. Finally, pad all contact points with dense foam or pipe insulation to protect the surface and distribute weight evenly across the support. Understanding the wheelbarrow’s mechanics can also help you refine the cart’s leverage and balance for easier hauling over uneven terrain. For additional stability, you can incorporate a design that mirrors the top bed extenders for trucks, which use adjustable arms to secure heavy loads. Before finalizing your cut, compare the cart’s overall weight capacity against the receiver hitch ratings to ensure your frame can handle the combined load of the kayak and gear.
Mount the Axle on Your Kayak Cart With U-Bolts
To mount the axle on your kayak cart frame, U-bolts are the best choice for a durable, secure connection that withstands rough terrain. First, ensure the U-bolt size matches your axle’s diameter: a 2-3/8 inch round axle requires a U-bolt kit with matching dimensions, while a 1-1/2 inch square axle needs smaller 3/8-inch bolts. Wrap the U-bolts around the axle and through a backing plate, then add washers and locknuts. Align everything carefully to keep the axle square and prevent shifting during use. Tighten each side evenly to avoid uneven stress, which can cause loosening or misalignment. Using zinc-plated hardware enhances corrosion resistance, especially if you’re frequently on salty or wet environments. After rough trips, check the fasteners to ensure they remain tight and secure, preventing unwanted movement or failure.
Choose Wheels for Your Kayak Cart’s Terrain
The best wheels for your kayak cart depend on the terrain you most often encounter. For soft sand, opt for low-pressure balloon wheels with a diameter of around 24 to 30 centimeters (9.5 to 12 inches). Larger wheels and lower pressure help distribute your load and prevent sinking, making beach crossings much easier. For these wheels, check the working load limit to ensure they can support your kayak’s weight safely.
On paved ramps and hard-packed trails, solid foam or rubber wheels in the 8 to 10 inch range work well. These flat-free wheels require no maintenance and are stable on smooth surfaces. For gravel or rough trails, choose wheels measuring 12 to 15 inches with puncture-resistant designs to handle rocks and roots effortlessly. For moving heavy gear across similar hard surfaces, a hand truck for moving often uses comparable durable wheel designs to ensure stability.
If your routes involve multiple terrains, a set of 10 to 12 inch airless tires offers a good balance of durability and stability without the hassle of inflation. Keep in mind that pneumatic tires absorb shocks but are vulnerable to leaks from sharp debris, so always select wheels suited to your most frequent route rather than the ideal scenario. For those who also value tool cart portability on shop floors, look for similar flat-free wheel designs that prioritize low maintenance and stability.
Secure Your Wheels With Washers and Cotter Pins
To secure your wheel properly, use one large flat washer and a cotter pin. Slide the wheel onto the axle, then place a washer made of stainless steel or galvanized metal to prevent corrosion. The material choice influences resistance to rust, friction, and overall lifespan. The washer’s purpose is to prevent side-to-side movement, helping maintain proper wheel alignment.
Depending on your cart’s design, you may add a second washer on the outer side of the wheel. Too few washers can lead to wheel shifting and contact with the frame, risking damage or misalignment. On the other hand, adding too many washers increases friction and drag, hindering smooth rotation. A typical wheelbarrow holds about 3 cubic feet of material, which helps you gauge the volume capacity for balancing your cart load. When planning your axle assembly, consider the total weight of your load to select washers that withstand realistic cost savings without premature wear. For trailers carrying kayaks, similar attention to wheel alignment helps ensure even weight distribution.
Next, insert the cotter pin through the axle hole and bend the split legs outward to lock it in place. Rotate the wheel to verify it spins freely without excessive play. Adjust the number and thickness of washers, including shim washers if necessary, to eliminate any axial slack. Achieving near-zero movement ensures the wheel is secured without binding, providing a smooth and stable roll.
Add Foam Padding to Protect Your Kayak’s Hull
Adding foam padding to protect your kayak’s hull is essential during transportation. Use closed-cell foam materials like minicell or high-density polyethylene to prevent scratches, dents, and pressure marks. A 3-inch foam thickness is ideal because it evenly distributes the load and reduces hard pressure points. Firmer foam compresses slightly, offering better shock absorption and supporting the hull during bumpy rides. For instance, a furniture dolly uses similar firm padding to protect items from shifting and damage during transport.
Position V-shaped foam cradles along your hull curves to ensure broad contact at stress points such as the bow and stern. Glue the foam directly onto your cart’s crossbars using marine-grade adhesive to keep it secure. Cut 12-inch-wide foam blocks to create stable, non-slip support that prevents your kayak from shifting during transit. Thicker padding helps distribute weight more evenly, reducing the risk of dents. Regularly check the padding for grit or debris that could scratch your hull and clean as needed to keep it in top shape. Proper foam padding keeps your kayak secure and protected without causing permanent damage.
Strap Your Kayak Down Without Damaging the Boat
To strap your kayak down without damaging the hull, start by placing foam padding along the areas where the straps will make contact. Center the kayak fore and aft between supports, aligning strap points near the strongest sections of the hull to avoid stress points. Use cam straps instead of ratchet straps, as they provide a snug grip without crushing or deforming plastic or fiberglass hulls. Keep the kayak parallel to the vehicle rack to ensure even tension. Avoid overtightening, especially in hot weather, because heat can soften the hull material and lead to deformation or damage. Attach bow and stern lines from the kayak to solid anchors on your vehicle at a 30 to 45-degree angle to enhance highway stability and prevent shifting. For those who also transport yard equipment, a sturdy cart can simplify moving heavy loads and prevent damage during transit. After driving for 5 to 10 minutes, recheck all straps and tension points since webbing can settle during transit. Tie off any loose strap ends to prevent flapping, which can cause wear and noise during travel. For long-term storage, consider applying a weatherproof coating to any wooden supports and explore storage solutions that keep your kayak secure, protected, and ready for your next adventure.
Test Your Cart on Flat Ground Before Hitting the Launch
Test your cart on flat ground before hitting the launch to identify loading or stability issues. Place the cart on level pavement and position it near the kayak’s center of balance. Ensure the hull rests symmetrically on both supports, with the keel aligned straight over the cart’s centerline. Check for rocking; if it tilts, reposition the kayak until both wheels share the load evenly. One user who tested a modified cart on a muddy trail with ruts found that flat-ground checks helped prevent slippage during real field conditions. Roll the loaded cart a short distance to see if it tracks straight without pulling. Listen for wobbling or scraping sounds. These flat-ground tests are vital for kayak storage and transportation safety, helping you catch problems early and prevent issues at the launch. Practice slow turns and quick stops to evaluate tip resistance. Also, inspect the wheels for firmness, tighten any loose hardware, and verify all contact points with the hull are secure before proceeding to transport.