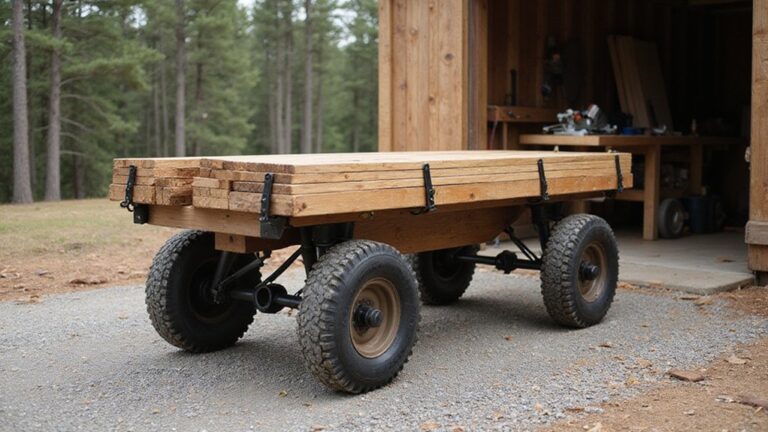
DIY Shop Vac Cart: Roll Your Vacuum Anywhere
Finding it frustrating to move your heavy, awkward vacuum around your workspace? A DIY shop vac cart can turn it into a smooth-rolling cleanup tool that’s easier to handle and more organized.
By the end, you’ll be able to build a sturdy, mobile unit that simplifies cleaning and saves you effort. The full steps and options are right here to help you get started.
Why You Need a DIY Shop Vac Cart?
A DIY shop vac cart is essential for improving mobility and organization during your projects. Carrying a heavy vacuum across the garage can be tiring, but a cart allows you to roll it easily between workstations, saving effort and reducing strain. It also makes it simpler to access tools or dust ports located in different areas, minimizing the need to reposition the vacuum repeatedly. This design can be made to function as its own dolly for mobility, eliminating the need for a separate cart. When securing the vacuum and accessories to the cart, consider using ratchet straps for added stability and to prevent shifting during transport. If you need to move your vacuum over rough terrain, a tow hitch design can offer superior balance and capacity over a simple mount. Understanding the correct load ratings is essential to avoid over-stressing the cart’s components during use.
By attaching a dust separator directly to the cart, you can capture debris at the source rather than letting dust spread across the floor. This not only keeps your work area cleaner—especially around saws and sanders—but also helps extend the life of your vacuum filter. The separator catches most chips and dirt, which decreases clogs and reduces maintenance.
A DIY cart consolidates your vacuum, hose, separator, and accessories into one mobile unit, boosting your shop’s organization. With everything in one place, setup and cleanup become faster and more efficient. Overall, a custom-built cart transforms how you manage dust control and equipment storage, making your projects smoother and your workspace tidier.
What to Look for in a Shop Vac Cart Design?
Stability is the most critical aspect when designing a shop vac cart. A stable cart prevents tipping, which can damage your equipment and ruin your project. To achieve this, opt for a wider, tapered base that lowers the center of gravity. Placing the heaviest components near the rear axle enhances stability during movement. Use two fixed rear casters combined with front swivel casters to improve steering control and balance. Material selection should prioritize durability; choose thick plywood or steel that supports the entire weight without bending or flexing. For a custom look and extra protection, consider painting or sealing the cart to match your shop’s aesthetic. Ensure the design leaves enough clearance for doorways and tight spaces, without sacrificing ease of maneuverability. Incorporate storage compartments for hoses and accessories, but keep the filter access area unobstructed for maintenance. Rounding the base prevents snags and tripping hazards, while setting the handle height at a comfortable level reduces fatigue during pushing or pulling. Finally, use total-lock casters to secure the cart when stationary, ensuring it stays put even on uneven surfaces. A wider, tapered base also mirrors the stability principles used in premium garden carts, which prioritize low centers of gravity to prevent tipping on rough terrain. Using thick plywood that matches the durability found in DIY furniture dollies ensures the base will not flex under heavy loads. For further inspiration, review how top bed extenders use a secure mounting system to keep loads stable during transport.
Why Add a Dust Separator to Your Cart?
Adding a dust separator to your cart can extend filter and bag life by capturing 95 to 99 percent of dust before it reaches your vacuum’s main filters. This significantly reduces the frequency of replacements, saving you money over time. It also cuts down on maintenance time since you won’t need to clean or change filters as often. A dust separator prevents abrasive grit from reaching the motor, minimizing wear and protecting your vacuum’s internal parts. With cleaner airflow maintained, your powered cart delivers more consistent suction, leading to faster pickup and fewer pauses during work. For example, mounting the separator and vacuum onto a collapsible folding wagon ensures easy transportation and a stable base. Understanding how a push cart works is essential for choosing the right base for your setup. Overall, a dust separator helps keep your equipment running smoothly and reliably on long or demanding projects. For a secure fit, always perform a final safety check after assembly to prevent tipping or detachment during use.
Gather Your Materials and Tools First
Gathering your materials and tools before you start cutting is essential. Start with 3/4-inch plywood, preferably Baltic birch for its stiffness, and consider using a partial sheet to reduce waste. You will also need four casters—locking swivels with 2- to 4-inch wheels—to make your cart mobile and secure. Screws, washers, and wood glue will provide sturdy joints for the frame.
Additionally, gather a dust separator to protect your vacuum, along with hoses, PVC pipe, rubber couplings, and a hose reel for neat storage. For tools, ensure you have a circular or table saw, a drill/driver, and a pocket-hole jig. Measuring tape, T-square, and clamps complete the toolkit needed for precise cutting and assembly. Proper planning of materials and tools now prevents unnecessary trips and keeps your build efficient. A well-prepared cart also helps reduce noise and vibration by securing components tightly, making your workspace more comfortable. The cart’s side rails are designed to hold the bucket lip securely and store extension wands. For a more versatile base that glides smoothly over thresholds, consider adding a furniture dolly under the plywood platform. When choosing your casters, prioritize wheelbarrow wheel durability to handle heavy loads without wobbling.
Build the Base and Mount the Casters
Cutting the base from 3/4-inch plywood to match your vacuum’s footprint, with a few extra inches on each side, provides a stable platform that won’t flex or tip under load. For added durability, choose thick plywood or solid wood to support the vacuum’s weight without bending. Use the caster plates as templates to mark mounting holes accurately. When building a heavy-duty platform, consider the weight capacity ratings of your hardware to match the vacuum’s weight. Drill pilot holes to prevent splitting and ensure the plates sit flush and square to the base. Tighten the screws diagonally to keep the plates flat and wobble-free. Space the casters wider apart to stabilize the cart and minimize tipping, with locking swivel casters at one end for maneuverability and rigid casters at the other for straight-line tracking. For added stability, pre-drill pilot holes to prevent splitting when attaching mounting blocks. To ensure the platform handles loads without flexing, select casters with high weight capacity ratings for durability. Once all the casters are secured, your base is ready for the next step. To keep the wheels rolling smoothly over time, regularly remove built-up debris and hair from the caster treads and axles.
Fit the Vacuum and Separator Securely
To prevent shifting during use, secure the vacuum and separator after positioning the base. Start by placing the vacuum canister low and centered on the bottom shelf to lower the center of gravity and minimize tipping risk. Position the separator adjacent to the vacuum for a compact and balanced setup. Mount the separator to a 5-gallon bucket lid or locking system to ensure a stable seal. Confirm the lid sits flush with no gaps around the rim, as a poor fit can cause suction loss. Use a snug friction fit rather than a loose resting fit on a moving cart for better stability. To prevent sliding, add a plywood base with retaining blocks around the separator. Recheck connections after initial setup and following initial use, since vibrations can loosen fittings over time. Ensure the separator’s lid is mounted using a mounting flange that sits flush and is sealed with putty or gap filler to maintain an airtight seal. For easy customization, consider following simple plans from a cart-building guide to adapt the base dimensions to your specific vacuum model. Before moving the cart, test the entire assembly’s balance on a flat surface, just as you would secure a load to prevent it from tipping during transport. Using a cam buckle strap around the vacuum canister adds extra security against vibration-induced shifting.
Three Layout Options for Your Shop Vac Cart
There are three primary layout options for your shop vac cart: vertical stacked, side-by-side, and hybrid low-profile. The vertical stacked layout places the cyclone separator above the vacuum, which minimizes the floor space needed. To ensure stability and durability, you should select sturdy casters and a strong upper shelf capable of supporting the separator’s weight. Safety precautions include securely anchoring the vacuum so it cannot shift or tip during movement. A taller cyclone improves dust separation efficiency by increasing capacity and reducing how often you need to empty the bucket. Understanding the basic design of a hand truck helps inform how to properly balance loads on a vertical cart. For added comfort during transport, consider choosing a model with wide, supportive seating to reduce strain when maneuvering the load. Applying a tangle-free storage method to the vacuum’s power cord prevents it from snagging on wheels during movement.
The side-by-side layout results in a wider, lower cart with a lower center of gravity, making it more stable. Heavy components like the vacuum and bucket are positioned at the bottom to enhance balance. When choosing materials, prioritize a wide base board for stability and check clearance for hose routing and easy removal of the dust bucket to avoid obstructions.
The hybrid low-profile design balances compactness and accessibility by positioning the vacuum low to the ground with the cyclone separator offset slightly above. This setup leaves upper space for switches, controls, or additional storage. Use materials that can accommodate partitioned compartments for organized tool and accessory storage. Always confirm that nothing blocks the dust bucket opening or hoses, ensuring safe and easy operation.
Test Your Cart for Balance and Stability
To ensure your cart remains stable and balanced, start by checking its center of gravity before loading. Measure where the combined weight of the vacuum, hose, and attachments sits, keeping heavy components low and close to the wheelbase stability region. Verify that the center of gravity falls within the wheel contact points. Distribute weight evenly from left to right; uneven loads can cause wandering or tipping.
Test static stability on a flat surface by gently pushing from each side. If a wheel lifts or the cart rocks, it indicates a stability problem. Simulate a ramp by tilting the floor; any wheel lift during this test means you need to redesign the layout or adjust the load distribution.
Load the cart to its maximum working weight and roll it over different surfaces: smooth floors, rough terrain, and thresholds. Make slow turns and stops, paying attention to caster flutter or shimmy, as these destabilize a tall cart. Secure the vacuum and attachments with straps, and recheck fasteners after each test. Ensure the cart remains stable at full load, during motion, and on slopes similar to or worse than expected in your environment. Re-test after any modification to maintain stability.