How to Change a Wheelbarrow Tire Tube: DIY Repair Guide
Getting a wheelbarrow tire replaced quickly can save you time and effort, especially if you’re in a hurry. With the right tools and a bit of know-how, you can have it done in under 20 minutes.
In this guide, you’ll learn the step-by-step process to swap out that stubborn tire tube and get back to using your wheelbarrow.
Keep reading for all the details.
Tools You’ll Need to Change a Wheelbarrow Tire
To change a wheelbarrow tire tube, you’ll need several essential tools. A socket wrench or adjustable wrench will help you loosen the wheel fasteners. Use a flathead screwdriver and tire levers to carefully pry the bead off the rim without damaging it. A rubber mallet can be useful for breaking a stubborn bead loose. For inflation, keep a hand pump or air compressor nearby. A spray bottle filled with soapy water quickly reveals leaks by bubbling at the failure point. A valve core removal tool is necessary for fully deflating the tire before removal. Make sure to have a replacement inner tube that matches your tire’s size. Applying tire talc or baby powder helps reduce friction and prevents pinching during installation. Check the rim for corrosion since rust can weaken the seal and lead to leaks. After reassembling, ensure the tire is balanced properly to prevent uneven wear and vibrations. Always wear work gloves and eye protection when working to guard against sharp edges and debris. Use liquid soap around the rim during reassembly to ease tire removal and ensure the new tube seats correctly. For heavy or awkward wheelbarrows, consider using a furniture dolly to stabilize the frame while you work.
How to Remove the Wheel Without Damaging the Axle
To remove the wheel without damaging the axle, follow these steps carefully. First, position the wheelbarrow on a stable surface by flipping it over, ensuring the wheel is accessible and properly aligned to prevent side loads during removal. Mark the original positions of any brackets or spacers to make reassembly easier.
Next, loosen and remove the nuts securing the wheel, or straighten and pull out the cotter pin if used. If you encounter a bolt that spins in place, hold its head steady with locking pliers to prevent it from turning. Slide the axle straight out—never pry sideways—as applying steady pressure will reduce risk of mushrooming the shaft. If the axle is stuck, apply a small amount of lubrication designed for axles and work it back and forth gently to loosen it. Use a socket wrench and vise grips to remove the axle brackets before sliding out the shaft. Knowing the correct number of wheelbarrows for a yard helps when selecting a replacement tire size that matches your hauling volume. When choosing a new tire, consider the load capacity and material of the caster wheels for optimal performance. For truck owners seeking a better transport solution, reviewing top kayak carriers may offer more secure strapping methods for heavy loads.
Lift the wheel free from the axle before removing the axle from the hub to avoid damaging the bearings and spacers. Be careful to keep loose bearings from falling out during removal. Remove any spacer sleeves carefully, ensuring you do not scratch or damage them. If the hub resists, check for rusted washers or hidden retainers that might be holding it in place before exerting additional force.
Breaking the Bead and Prying the Tire Off the Rim
To free a tire that refuses to separate from the rim, start by fully deflating the tire—use a valve core removal tool to ensure all air is out. Trapped pressure can make bead breaking significantly more difficult. Apply soapy water or tire lube around the bead line to reduce friction and facilitate separation. Slide the tire under the car and use the car’s jack at the designated jack point to break the bead if a manual bead breaker is unavailable. If you frequently maintain garden equipment, consider investing in a dedicated wheelbarrow reviewed for durability. Always perform a final safety check on all tools and lifting points before applying pressure to avoid injury. A two-wheel wheelbarrow often provides greater stability and balance, reducing strain during heavy loads.
Next, use a manual bead breaker or a jack-and-block setup to apply controlled pressure close to the rim edge. It’s often necessary to break the bead at multiple points around the rim to loosen it completely. When both beads are loose, insert flat pry bars or tire irons under the bead, lifting small sections over the rim lip at a time. Short, controlled pries are safer and less likely to damage the rim. Always protect the rim with padding and never pry against the metal itself. Once one side is free, the rest of the tire tends to peel off more easily. Proper bead breaking is essential for accurate tire balancing and smooth valve replacement later on.
Removing the Old Inner Tube Safely
To remove the old inner tube safely, start by fully deflating it through the valve core to release all trapped air. This prevents sudden movement and makes extraction easier. Next, push the valve stem through the rim hole to avoid tearing at this sensitive area, which is usually the tightest spot on the tube.
Once the valve is free, reach inside the tire and gently separate the tube from the interior of the tire. Old tubes often adhere to the rubber, especially if tire sealant has dried, so work your fingers around the tube to break these bonds. Use gentle, controlled motions—pulling steadily without sharp force—to reduce the risk of puncturing or damaging the tube or inner tire. This process is simplified because tubed tires are lightweight and easier to maintain than solid rubber alternatives, making them a preferred choice for light-duty gardening tasks that do not require heavy load capacity. Ensure proper mounting hardware is used if you later secure the wheel to a vehicle. For additional transport safety, similar tow hitch accessories can help secure equipment over rough terrain.
Remove the tube as a single piece if possible, handling it carefully to avoid tears or pinches. Before installing a new tube, make sure your work area is stable, and consider cleaning the rim thoroughly. Wearing eye protection is recommended to shield against any surprising sudden movements. Remember, slow and steady extraction is always better than a quick yank that could cause damage.
Inspecting the Tire and Rim for Hidden Damage
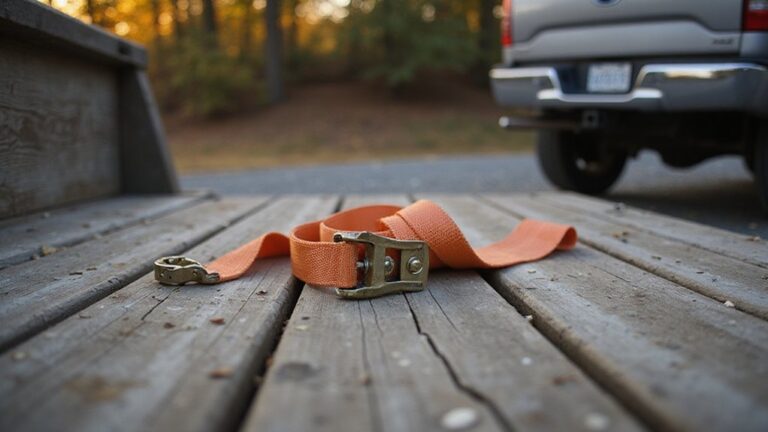
Inspecting the tire and rim for hidden damage is essential before installing a new tube. Start by thoroughly examining the tire surface. Look carefully at the tread and sidewalls for embedded nails, glass, or debris. Check for cuts, bulges, or uneven wear patterns that could indicate internal damage. Cleaning the tire beforehand is crucial, as dirt can conceal punctures or cracks that become visible only on a clean surface. Securing the tire during cleaning can be easier with top ratchet straps for holding it in place.
Next, assess the rim’s structural integrity. Carefully inspect for bends, dents, or cracks, especially around the flange areas and valve-stem holes. Examine the rim for signs of corrosion or pitting, which can create sharp edges that damage the tube. Check the bead seats for rust, burrs, or dirt that might compromise the seal or harm the new tube. Ensure the tire bead sits evenly on the rim without cracks, splits, or distortions.
Don’t forget to look inside the tire as well. Search for thorns, wire fragments, or marks indicating where the tube rubbed against a defect. Any major bends, cracks, or structural issues with the rim or tire warrant replacing the damaged component rather than patching it. Use a spray bottle with soapy water to locate any slow leaks from the tire or rim before final installation. A new tube cannot fix a compromised casing or rim; thorough inspection prevents future failures and ensures safety.
How to Prep a New Tube for Installation
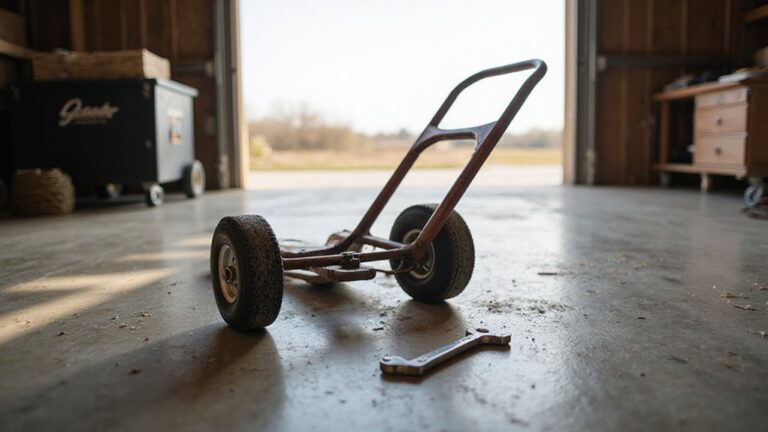
Before installing a new tube, you need to prepare it properly to prevent tears and ensure a snug fit. Start by checking Valve compatibility. Match the valve type—Presta or Schrader—and the stem length to your rim hole. Keep the packaging label for size reference to avoid using an incorrect tube. Next, lightly pre-inflate the tube; this helps remove folds and makes positioning easier, but stop before it becomes rigid. When Choosing lubricants, dust the tube with baby powder or talc. This reduces sticking inside the tire and makes installation smoother; avoid petroleum-based products, which can degrade the rubber. Also, verify the tube size matches the tire specification to confirm compatibility with the rim. For safe handling, always check the load ratings on your tools to avoid over-stressing components. Using a proper socket and wrench set ensures all fasteners are tightened to the manufacturer’s specifications. Then, thread the valve stem through the rim hole, ensuring it remains straight, which prevents strain and potential damage. For heavy equipment like wheelbarrows, using a stair-climbing hand truck can reduce physical strain when moving bulky loads. Finally, carefully arrange the tube evenly inside the tire, avoiding sharp folds or twists. Once the tire is partially inflated, recheck the shape of the tube to catch and correct any wrinkles early. With these steps completed, your tube is ready for the next stage of installation.
Installing the New Tube Without Twisting or Pinching
To install the tube without twisting or pinching, start by lightly inflating it with just a small amount of air. This gives the tube a rounded shape that resists folds and twists during insertion. After thoroughly cleaning the rim, apply tire lubricant to the inner edge of the rim to facilitate smooth positioning of the tube. Feed the valve stem through the rim hole first, keeping it perpendicular to the rim for proper alignment. This method is effective for modern wider rims, where you should start opposite the valve to ease installation. For heavy-duty applications, using a cam buckle strap can help secure the tire assembly during transport to prevent stress on the new tube. Gently tuck the tube evenly inside the tire, making sure it’s centered in the cavity without overlaps. When seating the second bead, begin opposite the valve stem and work gradually around the rim. Pause periodically to check if any part of the tube is peeking out or caught. Use your hands to push the tube away from the rim edge, avoiding tire levers which can easily pinch and damage the tube. Before fully inflating, verify that the valve sits straight and the tube isn’t twisted or trapped. Performing a quick perimeter inspection helps you catch and correct any issues early, ensuring a safe and hassle-free installation. For jobs requiring heavy loads, consider whether a push or pull wagon best suits your transport needs to avoid overloading the tire. For neatly storing excess ratchet straps after the job, loop them loosely and hang them to prevent tangles and kinks.
Reseating the Tire Bead Without Trapping the Tube
To reseat the tire bead without trapping the tube, start by working the bead onto the rim manually. Then, place a ratchet strap around the tire’s center and tighten it to push the bead outward, but keep the strap away from the rim edge to prevent pinching the tube. Inflate the tire slowly, avoiding forcing a large section at once, and use minimal prying tools if necessary. Make sure the tube remains centered inside the tire and that the valve stem is straight. Only release the strap once the bead begins to seal properly against the rim to ensure a secure fit. Listen for the audible “pop” as a sign of the tire seating and sealing.
How Much Air to Put in a Wheelbarrow Tire
Check the tire sidewall first; it indicates the maximum PSI your wheelbarrow tire can handle. Most residential tires operate between 20 and 30 PSI, with 30 PSI being a common recommendation. For light gardening tasks, aim for 20–25 PSI; for heavier loads or standard hauling, 30–35 PSI is appropriate if the tire’s sidewall allows. Never exceed the maximum PSI listed to avoid the risk of the tire bursting. For quality and performance, consider that a well-inflated tire contributes to a stable ride, similar to how a bicycle with a front basket ensures balanced handling for every trip. Proper tire pressure also distributes the load evenly, much like how the number of wheels on a wagon affects its stability and safe load limits.
Use a pressure gauge for accurate inflation rather than guessing by feel. Inflate the tire slowly, stopping once you reach the printed PSI limit on the sidewall. Before inflating, inspect the tire and rim for any damage or cracks. Adjust the tire pressure based on the load you’ll be carrying and the terrain you’ll be working on—not a one-size-fits-all number. For reference, top ratchet straps for securing loads offer similar reliability when properly maintained.
It’s good practice to check your tire pressure regularly, at least once a month or after heavy use. Proper inflation helps prevent pinch flats and gives you better handling, making your work safer and more efficient. Keeping your tire at the right pressure ensures your wheelbarrow rolls smoothly and lasts longer.
Common Mistakes When Changing a Wheelbarrow Tire (And How to Avoid Them)
Getting the tire pressure right only matters if the new tube survives installation, and that’s where many repairs go wrong. Using the wrong tube size guarantees failure, so always match the exact size stamped on your old tube or sidewall. Check both rim diameter and tire width together—do not rely on just one number.
Skipping a full casing inspection can lead to future punctures. Run your hand inside the tire to feel for debris or sharp objects before installing the new tube. When inserting the tube, add a little air—this helps prevent pinching and makes handling easier. Make sure the valve stem is straight and aligned with the rim hole; poor alignment can cause leaks or damage. Be careful not to pull the tube sideways at the stem, which can tear it. Gradually inflate the tube while watching for bulges, and listen for leaks immediately after inflation. Recheck the pressure after a short ride to confirm the repair is secure and the tube remains intact.