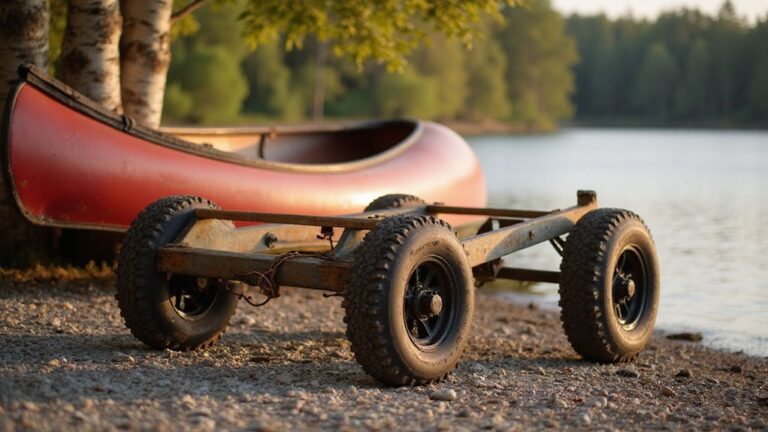
DIY Electric Beach Cart: Motorized Sand Hauler Build
If you’ve ever wondered how to build a DIY electric beach cart that can handle soft sand and carry more gear for less money, you’re in the right place. With a few basic parts and some simple wiring, you can create a motorized sand hauler that tops out at around 3 to 4 mph but hauls plenty of gear without sinking.
Keep reading for all the details to get you rolling.
Why DIY Beach Carts Cost Less and Haul More
You also gain superior hauling by customizing the cart to fit your needs. Want a 1000 lb capacity? You can incorporate stronger wheels and a wider frame without paying extra for premium features. This level of customization allows you to tailor the cart for your specific gear—whether it’s coolers, fishing rods, or chairs—so you’re not limited to a fixed retail layout. Because you handle the assembly yourself, you eliminate the retail markup, resulting in a stronger, more versatile beach cart that costs less overall. Building from PVC pipes keeps material costs around $4 to $6 per joint, making the frame cheap to adapt. For reliable maneuverability over sand, you might consider sourcing two-wheel wheelbarrow components for the base, as these designs prioritize stability and load balance. For attaching a tow hitch to your cart, a receiver hitch provides a secure mounting point for pulling heavy loads behind a vehicle. When choosing wheels for the build, look for models with pneumatic tires to absorb shock and maintain traction on uneven terrain, a feature commonly highlighted in reviews of professional moving equipment.
How to Pick a Cart Frame That Accepts Motor Mounts
Choose a frame with two parallel rear tubing around 118 to 124 millimeters apart. This spacing ensures compatibility with clamp-on motor brackets. Steel tubing is preferable for rigidity and durability, making it a solid choice for handling torque and vibration. Aluminum frames are lighter but typically require additional reinforcement at mount points to handle similar loads. Always perform a detailed load calculation to ensure your frame’s rated capacity exceeds your motor’s requirements. Leave sufficient clearance around the motor, chain, and hardware to prevent interference during operation. Welded chassis rails are better suited for repeated torque loads than folding joints, which tend to be weaker under stress. Opt for straight, flat tubing sections to make mounting easier. Reinforce junctions near the axle supports to maintain structural integrity. Ensure there is ample space in the rear axle area for easy adaptation and future modifications. Proper frame selection and planning are critical for a reliable, safe motorized cart. Using high-quality ratchet straps can also secure the motor and battery components firmly to the frame, reducing vibration-related wear. Consider that a bicycle with front basket typically prioritizes stable, rigid frame construction similar to this cart’s steel tubing requirement. For added peace of mind, verify that your chosen frame matches the towing capacity class requirements if you plan to tow additional cargo loads.
24V vs 48V Motors for Your Beach Cart Build
A 48V motor is generally the better choice for your beach cart if you need more power and efficiency. It draws roughly half the current of a 24V motor for the same wattage—so at 1,000W, a 48V system uses about 20.8A compared to 41.7A with 24V. This lower current reduces copper losses significantly, meaning less heat generation and less strain on your wiring. You can use thinner gauge wire without sacrificing performance, which cuts weight and simplifies installation. Additionally, 48V systems work better with advanced battery chemistries like LiFePO4, offering sustained power for heavy loads and long trips. Ensure you use proper loosening technique for any ratchet straps securing your cart components to avoid damage during maintenance. Motor winding techniques at 48V can also be optimized for better torque, especially when starting on soft sand. For those seeking an easier alternative, top collapsible folding wagons provide convenient non-motorized transport for lighter beach loads. When securing heavy items during transport, a cargo net helps prevent shifting and protects your gear. Overall, while a 24V setup is simpler and less costly, a 48V system provides greater performance, efficiency, and versatility for demanding beach cart applications.
Best Wheels for a DIY Beach Cart That Won’t Sink
Larger wheels, specifically 12-inch or 13-inch diameter balloon tires, are essential for navigating soft sand without sinking. The bigger the wheel, the better it rolls over ruts and uneven patches, reducing the effort needed to move your cart. Inflatable balloons tires are preferable over solid wheels because they conform to the sand surface, providing better traction and flotation. Additionally, lowering tire pressure increases the tire’s footprint, distributing the load more evenly and preventing your cart from sinking. Wide-profile tires further help by reducing rutting in damp or powdery sand. To optimize performance, ensure your tires are properly inflated to balance traction and flotation—too soft and they may be prone to damage, too hard and they won’t spread weight effectively. A top wheelie tool cart often uses similar large pneumatic tires for smooth rolling over uneven surfaces. Using secure hitch pin techniques is important for attaching any towed cart to a vehicle to prevent separation. Combining larger diameters with correct inflation will make your beach cart glide smoothly over sand rather than get bogged down. When selecting a tow vehicle for your cart, check that its handles and folding frames are sturdy enough to manage the extra load on soft terrain.
Battery Size and Wiring for Your Beach Cart
A 24V battery system in your beach cart uses two 12V batteries wired in series, which is essential for maintaining a more efficient and compact wiring setup. In this configuration, you’ll connect the positive terminal of one battery to the negative terminal of the other with a jumper wire. The remaining free terminals—positive on one battery and negative on the other—serve as the main output points. This arrangement results in a total voltage of 24V while keeping the capacity the same as a single battery; for example, two 12V 100Ah batteries in series still deliver 100Ah at 24V. For a safe installation, you should also verify that the bed extender hardware is securely fastened before testing the system under load. Before applying power, check that all connections are tight and free of debris, just as you would when performing a final safety check on a rear bike rack.
Using a 24V setup allows your main cables to be about half the size compared to a 12V system, reducing weight and complexity. Choose tinned copper conductors and crimped lugs to resist corrosion, especially in coastal, damp environments. Place the main fuse on the positive lead close to the battery, rated at or slightly below your controller’s maximum current. Install a disconnect switch rated for your system’s voltage and current to ensure safe shutoff. Make all interconnect cables the same length to promote balanced current flow and prevent uneven charging or discharging. For detailed guidance on selecting compatible wheel and axle components, refer to the assembly tips from the kayak cart build.
Bolt-On Motor Mounting: Sprockets, Chain, and Axle
To securely mount your motor, the setup must be both rigid and adjustable. Use slotted brackets or aluminum angle-and-channel systems to allow for easy motor shifts, which help you achieve precise chain tension and sprocket alignment. Proper motor placement influences how you manage chain tension—too tight can overload bearings, while too loose increases the risk of derailment. Check alignment by placing a straightedge across both sprockets; if they’re not in the same plane, adjust the rear axle position to correct this before tightening everything down. The chain should have a slight amount of slack visible—never drum-tight—and should move up and down slightly with no tight spots. Chain alignment minimizes wobble and wear by ensuring the chain tracks straight with the front sprocket, making chain alignment a critical step. Rotate the wheel by hand to look for binding or tight areas. When trimming chain length, use a breaker tool for a clean cut. Tighten all fasteners in a star pattern to evenly distribute tension, then recheck the alignment and tension after your first test run to ensure everything stays secure. For sandy terrain, consider a wide, low-pressure tire to improve flotation and reduce the risk of sinking into soft ground. A well-constructed motorized cart with proper alignment can handle a specific load capacity similar to that of a sturdy furniture dolly, ensuring reliable transport without structural failure.
Wire the Throttle, Brake, and Kill Switch for Safety
To ensure safety, wire the throttle, brake cutoff, and kill switch circuits correctly. Start by connecting the throttle’s 5V supply, ground, and signal leads directly to the controller. Confirm the correct polarity on all connections before powering up to avoid damage. The throttle’s signal lead should be tested to verify that it sends the proper movement input without interference.
Attach the brake sensors to their dedicated input on the controller; pulling the brake lever should immediately cut motor power. Make sure these sensors are wired reliably to prevent accidental activation failures. Install a red kill switch in an accessible location that interrupts the controller’s enable signal. When activated, this switch should instantly stop the motor, providing a fail-safe mechanism—if the switch opens, power is disconnected, stopping the vehicle. For optimal tension control of wiring bundles, apply the same ratchet strap threading principles to secure loose cables against vibration, ensuring proper tension prevents movement that could strain connections. When selecting a camping trailer for hauling gear, look for one with a lightweight aluminum frame that reduces the load on your bike.
Use sealed connectors and IP67-rated emergency stop hardware to withstand outdoor conditions and moisture. For added convenience, mount a waterproof wireless charging pad for your phone, which can also serve as a personal customization element. To maintain system integrity, test each circuit individually before attaching any load. Confirm throttle return to idle, brake cutoff engagement, and kill switch activation all operate flawlessly before any actual use.
How Fast Will Your Beach Cart Go? Real-World Limits
Your beach cart’s speed depends heavily on terrain. Soft, loose sand significantly increases rolling resistance, meaning your loaded cart will never reach high speeds. To maintain momentum, wider tires help, but expect to stay close to walking pace. Gearing plays a crucial role: lower gear ratios boost torque for climbing, while higher gear ratios can reduce your pulling power. For practical hauling, aiming for a speed of about 3 to 4 miles per hour ensures steady, controlled movement. This pace balances safety, stability, and battery efficiency, making your trips easier and more predictable. The motor system’s 700W total power supports this performance by providing sufficient torque for heavy loads on demanding surfaces.