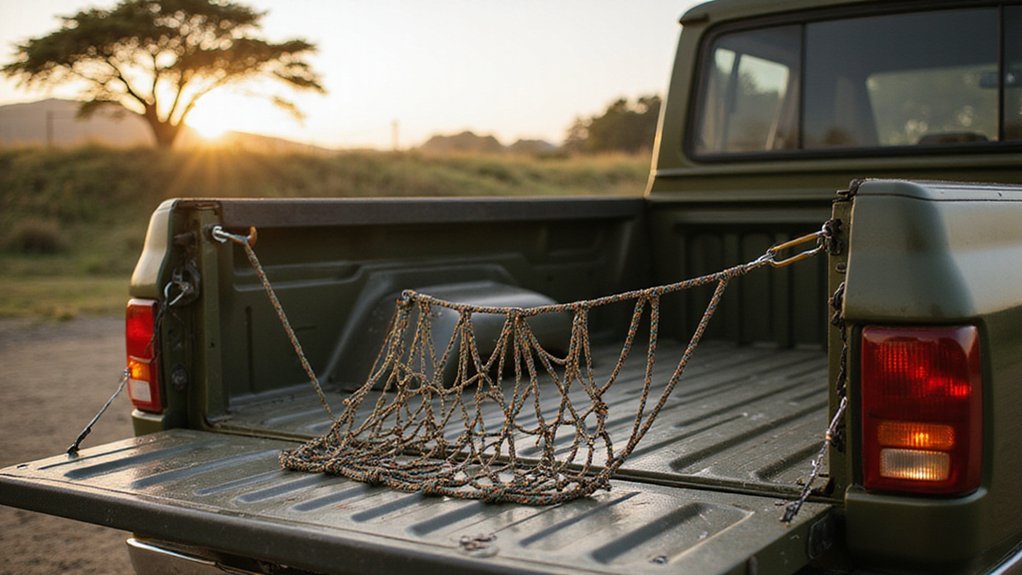
How to Make a Cargo Net From Paracord: DIY Guide
Thinking about making a cargo net from paracord? You’ll need enough cord—about 10 to 15 times the length of your final net—to get started.
Once you have your strands, you’ll learn how to attach and secure them properly to create a strong, evenly tensioned grid.
Keep reading for all the tips and tricks to craft a reliable cargo net from scratch.
Why Paracord Is the Best Choice for a DIY Cargo Net
Paracord is the best choice for a DIY cargo net because it combines high strength, flexibility, and durability. Standard Type III paracord can hold up to 550 pounds without adding unnecessary bulk, making it reliable for securing gear. Its braided core and sheath construction withstand repeated bending and tight lacing patterns, easily passing resilience tests. This design also ensures knots stay secure, although keep in mind that knots can reduce the cord’s effective strength by 20 to 40 percent. To maintain maximum strength, choose your knots carefully. For a heavier-duty alternative, consider using steel rod axles to reinforce the net’s attachment points against extreme loads.
Nylon, which is often used in paracord, offers about 30 percent elongation. This flexibility allows the cord to absorb shocks and adapt to shifting loads without snapping. Additionally, nylon’s moisture resistance means it dries quickly and resists rot, even in damp conditions. Overall, paracord provides a tough, adaptable material that keeps your gear securely in place in a variety of situations. For example, using a tow hitch can further stabilize your cargo net on a motorcycle rack. For added convenience, pairing your finished net with a collapsible folding wagon ensures you can transport heavy loads and their cargo net covers with ease across any terrain.
How Much Paracord to Buy for Your Net Size
For a net, you should buy approximately 10 to 15 times the length of your final span, depending on size and knot tension. For example, a small 4 ft by 6 ft net requires about 100 ft of paracord, while a larger 7 ft by 7 ft dense net needs around 400 ft. An 8 ft by 8 ft net with 2.5-inch spacing might need roughly 39 lengths of 12 ft cord, which totals around 468 ft. Keep in mind that knot tension can reduce cord length, so add at least 10% extra for trimming and adjustments. When starting your weaving, initially cut cords double the length of your net’s span; this is especially important for diagonal weaving. To ensure you have enough material, consider buying full spools rather than cut pieces, especially if you plan on using multiple colors or want to avoid running short mid-project. Round up your total length to the next full bundle size. This will cover outer perimeter cords and allow for test knots, which can be longer than expected due to tension. Proper planning ensures your project flows smoothly without mid-way shortages. For wheeled carts, large wheels provide better stability and clearance for your net setup, similar to how furniture dollies rely on robust wheels for smooth transport. Follow the same preparation and safety check steps used for a truck bed extender to verify your net’s attachment points are secure before use.
Plan Your Grid: Spacing and Knot Allowance
Decide your grid spacing based on the size of the items you’ll haul, as it directly impacts knot count and the final mesh size. For loose gear, aim for a 1 to 1.5-inch mesh to prevent smaller items from slipping through. For larger, bulkier cargo, a 4 to 6-inch grid reduces knot count but sacrifices support for small items. The opening size of your mesh must match the smallest item you intend to carry. To prevent load shifting during transport, secure your trailer hitch pin effectively by integrating an anchor point at the net’s perimeter. A DIY moving strap can be repurposed here to add extra tension and stability to your anchor point. Choosing a two-wheel wheelbarrow design can help stabilize heavy loads and reduce strain when moving bulky cargo.
When planning for knots, remember that each knot uses cord, so do not base your cut length solely on your finished gap size. Add 10 to 20 percent extra cord per strand to account for knot bulk. Smaller mesh designs with more junctions will need a larger allowance. Cut your vertical strands longer than the final length; you can trim them after tensioning to achieve the exact size.
Start your first row evenly, using a template if needed. Even spacing is more important than perfect symmetry because it helps keep the diamond pattern stable. Early adjustments might be necessary if initial spacing seems uneven, as incorrect first-row spacing can distort the entire net. Use a two-strand crown knot for construction to create secure, durable junctions that reliably hold the grid spacing.
Set Up Your Work Area and Anchor Lines
To set up your work area and anchor lines effectively, start on a clean, flat surface such as a floor or large table. This ensures your net lays out evenly and remains properly aligned during assembly. Remove any sharp edges or debris that could snag your cord or distort measurements. Leave enough space around all sides to access corners comfortably without twisting the mesh. When planning the net size, ensure the final dimensions are slightly larger than the cargo area to allow for stretch and a secure fit. Additionally, apply correct tie-down angles to optimize tension and prevent the load from shifting during transit. Knowing the total cubic volume helps, as a standard yard of material fills about 14 wheelbarrow loads for accurate planning. When measuring for fit, always check the wheel diameter to ensure the net matches the anchor points properly.
Gather tools like tape, chalk, and temporary markers to mark your anchor points. Begin by identifying and marking the corner positions, then add intermediate points to distribute attachment evenly. Double-check that these marks correspond to your cargo area dimensions before tying the lines. This careful planning helps maintain tension and prevents misalignment during installation.
Inspect each anchor point thoroughly before attaching your net. Use solid tie-down points such as bed loops, rails, or pad eyes—avoid plastic trim or weak points. Look for signs of looseness, rust, or cracks that could compromise security. Pre-stage all your supplies like paracord, hooks, and carabiners. When attaching, work in a circle or crisscross pattern to ensure even tension. Pull the lines tight but leave room for final adjustments, and always double-check every connection to confirm nothing has slipped or loosened.
How to Attach Vertical Strands to the Top Cord
To attach vertical strands to the top cord, fold each strand in half at its midpoint to form a bight. Then secure the bight around the top cord using a lark’s head knot. This knot keeps both working legs even, ensuring your net starts with a uniform appearance. You can experiment with variations like the overhand hitch for different grip levels or incorporate color patterns by alternating strand shades for visual interest.
Space the strands evenly along the top cord, aiming for 1 to 6 inches apart depending on your net’s size. Measure the gaps carefully to maintain uniform spacing, which helps prevent distorted diamond shapes later. Make sure each folded loop faces the same direction, as misalignment can compound in subsequent rows. Leave extra cord length at the ends so you have enough for future knots; each knot shortens the usable cord, so plan to cut vertical strands roughly double your final net height. After attaching all strands, lightly tension the top cord to check for spacing errors before proceeding to the next row.
Tie the Mesh With Secure Paracord Knots
Tie each intersection with a modified sheet bend to create a stable mesh that is both fast and strong for paracord. As you work, ensure you pull evenly on both strands to maintain proper knot tension, allowing the join to sit snug without distorting the line. Roll each knot between your fingers while cinching to remove any slack completely. Keep the strands aligned by making sure both ends extend equal lengths from the knot, which distributes load evenly across the mesh. For the final row, use a double sheet bend for added security—tighten it firmly before trimming the tails. Check each intersection for symmetry, as uneven tightening can lead to irregular stress points. Consistent cinching across all joints prevents slippage under use; thus, take your time to pull each knot deliberately before moving on to the next. For overall load stability, ensure correct tie-down angles are maintained to prevent shifting during transport. For the edges, consider using webbing-style straps similar to top cam straps for extra reinforcement and security.
Keep Your Net Spacing Even and Tension Consistent
Maintaining even spacing and consistent tension is essential for a neat, stable net. Use a measuring gauge on each row to lock in your mesh size accurately. Mark the target spacing on a cardboard gauge and double-check it after several knots, as cord stretch can alter the openings. When cutting repeated paracord lengths, ensure they are all the same measurement before tying, and remember to account for the doubled-over cord. Uneven strands can cause the mesh size to drift, so aim for uniformity in every strand. This approach mirrors the rigorous standards seen in top cargo bike reviews, where consistent mesh quality directly impacts performance and load stability. A reliable build requires high load capacity, just as a well-constructed cart must handle its maximum intended weight. Checking your net against quality and performance benchmarks ensures each knot holds securely under strain.
Apply equal tension with each connection, tightening gradually to avoid unevenness. Inconsistent tension can make some openings tight while others remain loose, compromising the net’s appearance and strength. Build your net from the center outward, checking for symmetry after each row to catch any drift early. Once several rows are in place, compare the overall net against the final span to ensure the tension remains even across the frame.
Spanning the entire net with consistent tension helps it sit flat and look even, preventing sagging or bunching. Regularly checking your work prevents small errors from compounding, resulting in a neater, more professional-looking finished product.
Seal the Ends and Finish the Edges
Sealing the ends of your paracord with heat is essential for a clean, snag-free finish. Start by making a precise vertical cut with sharp scissors to create a neat edge. Then, use a lighter or hot tool to apply short, controlled bursts of heat to fuse the sheath. While the nylon becomes soft, press it flat with your fingers or a tool to ensure a smooth, tidy finish that won’t catch or fray. This technique works for most synthetic cords, but be mindful of the environmental impact when melting nylon. For a neater appearance, tuck the hidden ends under adjacent knots before tightening the net completely. You can also experiment with different colors by sealing ends in contrasting or matching hues, but check that each fuse securely captures the inner core. Finally, smooth the sealed edges to create rounded, durable tips that resist fraying during repeated use, but avoid excessive charring which can weaken the material. When selecting paracord for this project, consider how the cord’s durability and performance compare to the best bike with bike trailer systems, as both prioritize long-term reliability over short-term convenience. Before fusing, always sacrifice a small length of cord to remove any damaged fibers, ensuring a clean, even cut that promotes a stronger seal. Unlike a DIY cargo net, the top beach wagons are designed to handle heavy loads of gear over sand without the need for manual knotting. For applications requiring attachment to a vehicle, a receiver hitch provides a secure mounting point that supports heavy cargo without compromising stability.
Mount Your Cargo Net Without Sagging or Risks
To mount your cargo net without sagging or risks, follow a strategic placement process. Begin by identifying and marking your anchor points, positioning them symmetrically to ensure even tension distribution across the net. Start tightening on the non-adjustable side first to establish a secure foundation, then move to the adjustable side to efficiently remove slack.
Place attachment points thoughtfully, making sure they’re accessible and won’t twist as you tighten. Use simple tools like a tape measure to verify symmetry and tension, avoiding entangling cords or uneven pulls. Fully stretch the net before installation to eliminate initial drape and to create a firm base for tensioning.
Pull most slack through your tensioning device, then tighten in a symmetrical pattern to prevent sagging. Mark tightened sides with cargo tags to track which areas have been secured. After the initial installation, drive a short distance and recheck the tension—loads tend to settle, and retightening may be necessary. Ensure the net covers edges and corners firmly to prevent lifting during transit, and inspect all connections before every trip. Periodically stop to verify that the net remains tight and secure throughout your journey.