How to Use Husky Ratchet Straps: Complete Guide
Ever wonder how to secure your cargo safely using Husky ratchet straps? Getting the tension just right and knowing how to handle the hooks can make all the difference.
By following some simple steps, you can ensure your load stays put and your transport is smooth.
In this guide, you’ll learn how to properly inspect, load, tighten, and store your straps for maximum security.
Keep reading to get all the tips you need to lock down your cargo with confidence.
How to Read Your Husky Ratchet Strap’s Load Rating Label
To determine how much weight your Husky ratchet strap can safely handle, locate the Working Load Limit (WLL) on the label. This number indicates the maximum safe load you should apply during regular use. It’s different from the breaking strength, which is the point where the strap fails in testing. Typically, the WLL is about one-third of the breaking strength, offering a safety margin for everyday application. Check the sewn-on tag or the webbing itself for this rating. If only a single number appears, confirm it represents the WLL and not the breaking strength. Remember to also verify the hook type and strap width, as the component with the lowest load rating determines your overall capacity. Without a clear, readable label, you risk overloading the strap and compromising safety. For a better understanding of how cam buckle straps compare in quality and performance, consult a guide that reviews top picks. When selecting a tie-down system, consider the same weight capacity and durability factors that influence caster wheel choices to ensure long-term reliability. For moving heavy furniture, using a furniture dolly can help distribute weight evenly and protect your straps from excess strain during transport.
How to Thread and Set Up a Husky Ratchet Strap
To properly thread and set up your Husky ratchet strap, start by laying the webbing out flat to remove any twists. Fully open the ratchet handle so the center spindle is exposed. Ensure the webbing path is straight to prevent bunching or tangles.
Next, feed the loose end through the center slot from the underside toward the handle side. Pull it through until there is only moderate slack, keeping the webbing flat to avoid twists or overlaps. This helps ensure smooth operation when ratcheting and secure tension.
Position the strap on your load. Attach the fixed hook to a rated anchor point first, then route the strap over your cargo. Attach the working hook to a second secure point on the opposite side. Before ratcheting, pull the loose end with your hand to eliminate excess slack. Verify that both hooks are firmly attached and that the webbing lies flat without overlaps. Leave enough webbing for the ratchet mechanism to wind properly, typically a few inches, to avoid jams or slack. If you are securing a bike, using a cargo rack bike mount can help provide stable anchor points for your ratchet straps. Understanding common failure points on hardware like caster wheels can help you inspect your ratchet strap components for similar wear and prolong their lifespan. For moving heavy items, choosing the right dolly or hand truck can prevent strain on both your straps and your back.
How to Tighten a Husky Ratchet Strap Without Overdoing It
When tightening a Husky ratchet strap, stop as soon as your cargo no longer moves under firm hand pressure. Over-tightening risks damaging both your load and the strap. Aim for a snug hold that keeps everything secure without applying maximum force. Use gradual, controlled pulls instead of a single hard yank to ensure even tension and prevent webbing creases. Watch for warning signs such as a ratchet that becomes hard to operate, webbing that starts to crease or distort, or cargo surfaces that show signs of deformation. True tension isn’t about maxing out the strap but about removing slack and achieving a firm, even hold. A good rule of thumb is tightening to about 30 to 50 percent of the strap’s working load limit. After you lock the ratchet, double-check that the strap remains flat and the load stays in place. If you notice deformation or feel excessive resistance on the handle, loosen the strap slightly. Proper tension holds your cargo securely without crushing or damaging it. The ratchet mechanism is typically the first component to fail under excessive force, so avoid pushing past the point where the handle becomes difficult to operate. A common error is attempting to force the handle by using a cheater bar, which can bend the ratchet frame or snap the webbing. For trucks with a bed extender, ensure the strap does not pinch or abrade against the extender’s frame, as this can compromise both the strap and the extender’s stability. Choosing a strap with a higher working load limit can provide extra safety margin without requiring maximum tension during use.
Simple Safety Checks for Your Husky Ratchet Strap
Before each use, perform these simple safety checks to ensure your Husky ratchet strap is in proper condition and will hold securely. First, verify that the working load limit (WLL) tag is legible; if it’s missing or has been altered, retire the strap immediately—don’t guess its capacity. Check the webbing material for compatibility with your cargo and anchor points, making sure it isn’t torn, frayed, or showing signs of UV damage such as stiffness or chalkiness. Inspect hooks and fittings to confirm they aren’t bent, spread, or broken, as this can compromise safety. Examine the stitching along the webbing for any broken or missing threads, which could lead to failure under load. Test the ratchet mechanism by rotating it smoothly and ensuring it locks securely—any rust or corrosion on hardware indicates it should be replaced. Lastly, clear away any grease, dirt, or debris from the strap and hardware, and avoid knots or twists that could weaken the strap’s integrity. For heavy items you plan to lift rather than tie down, consider a DIY moving strap design that distributes weight evenly and saves on equipment costs. For peace of mind on heavy loads, compare quality ratings from independent reviews to confirm your strap’s performance matches its intended use. If you notice any serious damage or defects during these checks, discard the strap and replace it before use. A garden cart with seat often includes integrated tie-down points that pair well with ratchet straps for secure transport.
How to Release and Remove a Husky Ratchet Strap Safely
To safely remove a Husky ratchet strap after release, first pull the webbing back through the spindle slot. Use the webbing to guide it smoothly away from the mechanism, helping to prevent tangling or jamming. Only unhook the strap from anchor points once enough slack is created. If the strap is stubborn and resistant to release, fully flatten the handle to disengage the mechanism and then re-engage the release if necessary. For a stuck strap, apply a layer-by-layer loosening technique by gradually working the outer strap layers inward to free the cylinder without forcing it. After removing the strap, carefully inspect it for any signs of damage or wear. Ensure all hooks are intact and free of corrosion or deformation before storing the strap for future use.
How to Store Husky Ratchet Straps to Prevent Damage
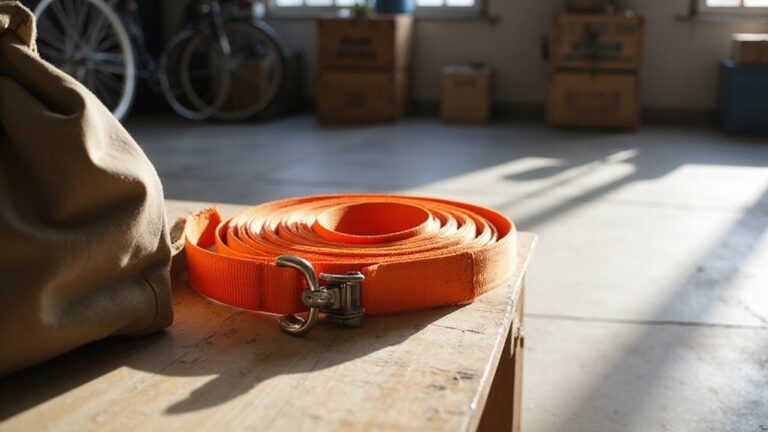
Proper storage of your Husky ratchet straps after each use ensures their longevity and safe operation. First, make sure each strap is completely dry. Wipe off mud, oil, dirt, and chemicals, then hang them to air dry fully. This prevents mold, mildew, and corrosion on the metal hardware. To avoid damage, coil the straps neatly from the non-ratchet end and secure them with a Velcro strap or zip tie. Store the straps in a cool, dry, dark location, keeping them away from UV light, weld spatter, and grinding debris that could cause deterioration. For a budget-friendly alternative, some DIYers repurpose a simple PVC pipe holder, similar to a welded cart design, to organize and protect their straps without costly equipment. For those seeking premium cargo solutions, quality carriers from Thule offer similar durability and protection for your gear. Using a beach cart with large, sand-friendly wheels can simplify transporting heavy straps and gear across soft terrain to your storage area.
Always leave the mechanism loosely closed, avoiding tension on the webbing, which can stretch or weaken the straps over time. Do not stack heavy items on top, as excess weight can deform or damage the hardware. A simple yet effective method is to separate straps by length to reduce tangling and wear. Before storing, inspect each strap for fraying, cuts, or rust. Replace any damaged straps immediately to maintain safety. Regular inspections help identify hidden damage early, ensuring your straps stay ready for reliable and safe use.