DIY Garden Cart: Easy Build for Yard Hauling
Got a yard project that needs hauling but no sturdy cart to rely on? Building your own garden cart is surprisingly simple and budget-friendly. With just a few basic supplies like wood and rubber wheels, you can create a dependable tool to make yard work easier.
By the end of this, you’ll know exactly how to assemble a strong, functional cart tailored to your needs. Keep reading to see the step-by-step details to get your DIY garden cart off the ground.
Pick the Best Lumber and Dimensions for Your DIY Garden Cart
Choose 2×4 boards for the main frame, including long rails, crosspieces, and handle structures. These provide stability and support for heavy loads. For lighter bracing and handle components, 1×2 lumber helps reduce overall weight without sacrificing strength. Use straight-grain wood to resist warping and twisting when exposed to outdoor conditions. For moving large loads, consider a furniture dolly to supplement your cart’s hauling capacity. Before assembling, perform a safety check on all frame connections to ensure the cart remains secure under heavy use. Always use a ratchet strap to secure bulky items during transport.
For the deck, a 24 by 36-inch bed offers a compact space suitable for bags and tubs, while a 24 by 57-inch footprint accommodates longer loads. Select 3/4-inch exterior plywood to create a sturdy, moisture-resistant surface. Always check actual lumber thickness, as cedar, for example, may measure 7/8 inch instead of 3/4 inch, which can affect your overall dimensions. Use outdoor-rated treatments on all lumber to extend your cart’s lifespan and withstand the elements.
Build Your DIY Garden Cart Frame in 3 Simple Steps
To square your frame precisely, measure diagonally from corner to corner on both sides. Matching lengths indicate the frame is true. If measurements are off, adjust the positions of the sides before fully tightening any bolts or screws. Using a framing square at each corner ensures right angles and helps maintain accuracy throughout the process. Before squaring, preload the flat plates into the profile sides to prepare for the uprights mounting, which secures the base structure for accurate alignment. For heavy loads, ensure your hauling setup includes ratchet straps to safely secure the cart’s contents during transport. For sandy terrain, consider using balloon tires for easier maneuverability. For more stability under heavy weight, a two-wheel design improves balance and reduces tipping compared to single-wheel options.
Attach Wheels and Axle That Handle Your Dirt Pile
To attach wheels and an axle that can handle your dirt pile, you need a 5/8-inch axle set. This size is standard for carts capable of hauling over 200 pounds of dirt. Choose 13-inch solid rubber wheels with sealed bearings to ensure puncture resistance and smooth rolling. These solid rubber wheels are a type of caster wheel commonly used for heavy-duty hauling applications. Match each wheel’s rating of at least 300 pounds to the capacity of your axle to support heavy loads safely. For kayak owners, similar cam straps are essential for securing heavy loads during transport. Slide the axle through the frame brackets and secure the hubs tightly. Check that both wheels sit parallel and are aligned straight; uneven alignment causes steering issues and premature tire wear. Before mounting, apply lubrication to the bearing surfaces to reduce friction and extend their lifespan. Tighten the axle nuts snugly but leave a small amount of play to allow for free spinning. Verify that the wheels lift cleanly and can rotate without rubbing or resistance before loading up. Proper assembly ensures reliable, smooth operation when hauling your dirt pile. For additional guidance, review top heavy duty utility carts that feature similar axle and wheel specifications for tough tasks.
Add a Durable Handle, Then a Box or Flatbed
Add a durable handle, then a box or flatbed.
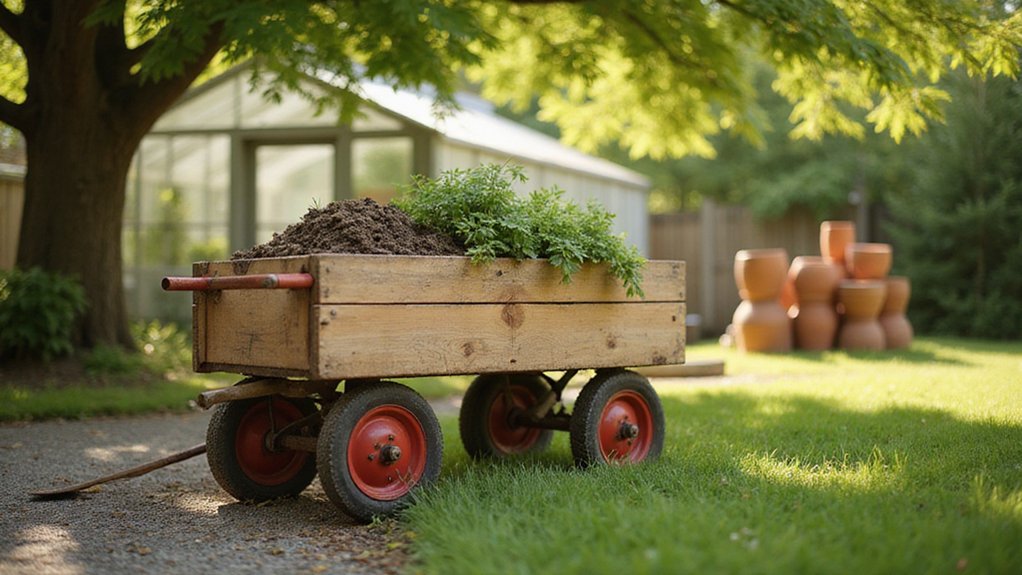
To choose your bed design, consider what you’ll be hauling. For loose loads like soil or mulch, build a plywood box with floor supports spaced 12 inches apart. Overlap the side panels and fasten them with No. 10 flathead screws and glue to prevent spillage. Reinforcing the joints ensures the box stays intact under heavy loads. For bulky or uneven items, opt for a flatbed made from 5/4-inch pressure-treated decking boards laid across the base. A 24 by 57-inch platform provides easy access and speeds up loading and unloading, especially for pots or bagged materials. Adding a sturdy handle to either design makes maneuvering simpler, especially when the load shifts or the terrain gets rough.
Strengthen and Seal Your DIY Garden Cart for Years of Use
To strengthen and seal your DIY garden cart for years of reliable use, start with thorough weatherproofing. Apply an exterior wood sealer to all wood surfaces, especially the end grain, before final assembly. Use a brush to apply two coats, making sure the wood is clean and dry beforehand for maximum adhesion and protection. Secure the ratchet strap to hold the frame tightly in place while the sealer cures. Similar to the careful steps for attaching a rear rack, perform a final check to ensure all bolts are tight and the frame is stable. Reinforce joints with galvanized metal corner braces, which resist rust and improve structural integrity. Add a continuous silicone bead along seams and around drilled holes to prevent water entry. Seal all cut edges and any exposed drilled areas to avoid moisture infiltration. Choose a sealer that offers UV and water resistance, and reapply annually when water no longer beads on the surface. To prolong your cart’s lifespan, store it under cover when not in use. This process mirrors the simple plans and upgrades recommended for building a sturdy canopy wagon.