DIY Pannier Bags: Sew Bike Bags for Almost Nothing
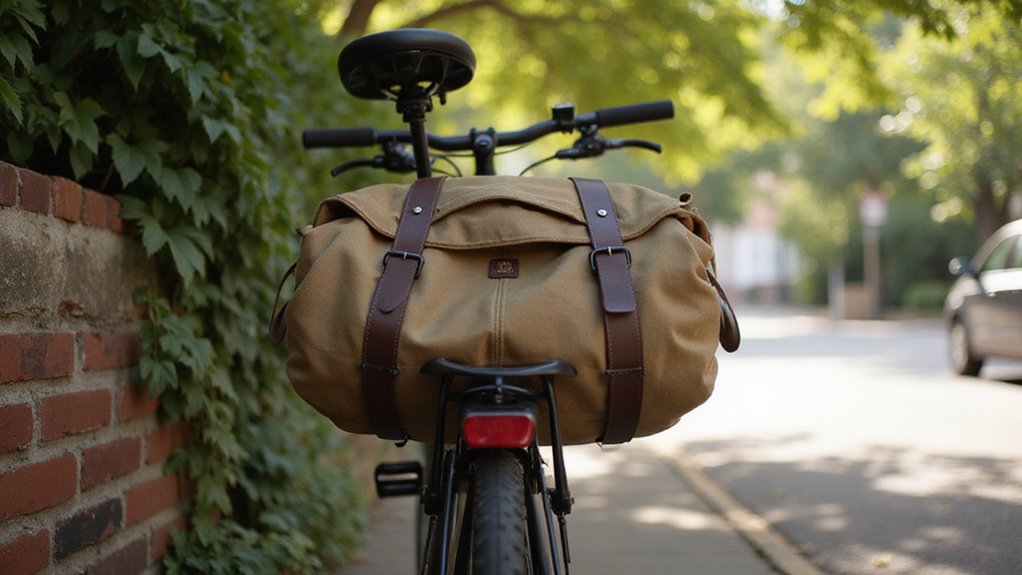
Wondering how to make durable bike pannier bags without spending a lot? You can craft tough, reliable bags by repurposing thrifted canvas or Cordura totes instead of starting from scratch.
Reinforcing stress points and using simple fixes like a rain flap make your bags both affordable and sturdy. Read on to see how you can build your own reliable gear that beats store-bought options.
Why a Thrift-Store Bag Beats New Fabric for Panniers
Using a thrift-store bag simplifies the process by almost eliminating the need for cutting, panel assembly, and seam sewing. Instead, your focus shifts to selecting the right bag, adding mounting hardware, and finishing touches. This approach allows you to create a durable pannier quickly and cheaply, avoiding the full build effort typical of new fabric materials. For securing your finished pannier to a bike rack, consider heavy-duty furniture sliders to prevent slipping on carpeted floors during indoor setup. Selecting a bag with a stiff base also helps maintain its shape when loaded, much like dollies with sturdy platforms that distribute weight evenly for stable transport. This modular mindset means you can later adapt the same mounting system to a canopy wagon for hauling gear on off-bike adventures.
Canvas, Cordura, or Tote: Toughest Pick for Your Build
Canvas is the easiest material to work with for making pannier bags; it’s stiff, simple to sew, and offers decent durability. Typically, 10 to 16 oz canvas strikes a good balance for a boxy, commuter-style build, as it’s forgiving on standard sewing machines and budget-friendly. However, canvas’s abrasion resistance is lower, withstanding around 50,000 double rubs before showing significant wear. This makes it suitable for moderate loads and light rain but less ideal for harsh conditions. For tougher use, such as scraping curbs or carrying heavy cargo, Cordura outperforms canvas significantly—surviving over 300,000 double rubs—and is better suited for rugged, high-stress environments. The downside is that Cordura is pricier and can be more demanding on your sewing equipment. A heavy tote bag can also work if made from dense 12 to 16 oz canvas and reinforced with stress seams. Avoid lightweight totes, as their fabric tends to fail under vibrations and heavy use. Overall, if your commute is moderate and weather conditions are manageable, canvas provides a good, easy-to-handle choice, while Cordura is your best bet for more brutal, wet, or abrasive rides. For securing your finished panniers to the bike, consider using cam buckle straps for adjustable and reliable fastening. Before choosing a fabric, check receiver hitch types to see if your bike rack uses a similar mounting standard for cargo accessories. When sliding loaded bags into tight rack positions, remember that proper lifting technique minimizes strain and protects the fabric from tearing at stress points.
Measure Rack Spacing to Avoid Wheel Rub Before Cutting
To measure rack spacing to avoid wheel rub, check the axle-to-axle distance at the lower mounts before cutting fabric. Rear racks typically match dropout spacing around 120 to 135 millimeters, but confirm your specific axle spacing since some designs range from 150 to 180 millimeters. Front racks usually align with 100-millimeter dropouts. Incorrect spacing causes the bag to sit inward, increasing the risk of contact with the wheel. Precise measurement ensures your rack fits well and avoids interference during rides. For additional stability, consider reviewing top adult tricycles that accommodate wider rack spacing. Correct tensioning technique prevents the bag from shifting toward the wheel when strapped down. For secure bag attachment, consider using Top Ratchet Straps for their proven quality and performance.
4 DIY Pannier Mounting Methods for Rack Stability
Using multiple mounting points enhances rack stability significantly. Start with a top-hook combined with a lower anti-sway catch, positioning the lower catch near the rack’s leg to preload the upper hooks. This setup prevents side-to-side movement and keeps your bag secure when riding over bumps or corners. Second, an S-hook with a bungee cord provides simple tension: pull it tight until the bag stops swinging outward. This method allows quick adjustments and works well on varied rack shapes. Understanding the receiver hitch as a standard mounting component can help you adapt these methods to cargo racks beyond bicycles. For enhanced performance, consider the top-rated ratchet straps reviewed for quality and reliability in securing heavy loads. When selecting bungee cords for this purpose, look for clips with secure locking mechanisms that prevent accidental release during rides.
Third, universal mounts based on hook-and-loop or straps offer flexible fitting when your rack’s geometry doesn’t match fixed hooks. A lower strap or a hard catch can be used interchangeably, depending on your bag’s weight and rack shape. Finally, sliding lower hooks or anti-sway fingers that clamp onto your rack’s strut can be employed for added stability.
Apply stability adjustment techniques by centering the lower stabilizer between your upper hooks. Always test-fit your setup before riding: the bag should hang straight, and the lower connection must be snug enough to eliminate rattling. Ensuring these points helps prevent sway and keeps your load secure throughout your ride.
Stitch Seams That Won’t Rip Under Load
To ensure your seams won’t rip under load, use flat-felled or double-stitched seams, which evenly distribute stress across multiple rows of stitches. This approach strengthens the seam’s durability and reduces the risk of splitting when carrying heavy loads. Reinforce attachment points with bar tacks or Box-X stitching for added load-bearing capacity. Select bonded polyester or nylon thread in Tex 70 or Tex 90 to handle stress without breaking. Set your stitch length longer enough to prevent weakening the fabric—typically between 3.5 to 4.0 mm—avoiding overly dense stitches that create new weak spots. Lock each seam securely with backstitching at both ends, and apply seam tape over high-stress areas to improve toughness and prevent unraveling. Remember, your goal is to share load evenly across the seam, not to add more stitches unnecessarily.
Reinforce Your DIY Pannier Base Without Plywood
To reinforce your DIY pannier base without plywood, corrugated plastic sheet offers a lightweight, waterproof alternative that is easy to work with. Cut the plastic to fit your base dimensions as a drop-in panel. Bend it in one direction along the flute structure to improve fold behavior and rigidity. For additional support, create an L-shaped insert to strengthen the bottom and side, or use a U-shaped aluminum piece to form a semi-rigid frame. Secure your reinforcement with rivets drilled into the plastic, bolts with washers to distribute load, or contact cement for bonding layers. Cover raw edges with heavy-duty tape or edge trim to prevent abrasion and wear. These stiffeners effectively eliminate sagging, keep your bag stable on the rack, and extend the durability of your pannier setup. Before finalizing your build, consult the final safety check steps used for a truck bed extender to confirm all fasteners are tight and load-bearing points are secure.
Sew a Rain Flap in 4 Steps Using Your Top Edge
To sew a rain flap using your top edge, follow these four steps. First, cut outer and lining pieces for your flap, ensuring they are slightly larger than the opening you want to cover. This extra size creates the overhang needed to shed water effectively. Next, sew the outer and lining pieces together along the side and bottom edges, leaving the top edge open. Turning the flap right side out and pressing it smooth prepares it for attachment. During assembly, ensure the good sides of fabric face each other for proper alignment. Consider how mounting hardware works to keep the flap’s attachment points secure and evenly tensioned. The overhang principle is similar to how a wheelbarrow’s forward lip directs material away from the operator.
Then, topstitch near the edge of the flap to reinforce the seam and give a neat finish. When positioning the flap, center it over your bag’s opening and align it with the top seam. Pin or clip the flap in place to keep it from shifting during stitching. Finally, sew the flap onto the top edge with a narrow seam allowance, backstitching securely at the start and end. This overhang diverts water away from your closure, helping to keep your contents dry without adding bulk.
Field-Test Your Pannier on a 2-Mile Ride Before Commuting
Test your pannier on a short, 2-mile ride before daily commuting. Load it at about 80% of your planned weight, with heavy items positioned low and close to the axle. During this test, observe for heel strike, hook slip, and side-to-side wobble when turning or braking. Pay attention to how the bike feels—if steering pulls or the bike leans, adjust the weight distribution until it feels balanced and neutral. A stable, balanced load is essential for maintaining comfort and proper riding posture. After completing the ride, recheck all fasteners and hardware. The pannier passes if it remains quiet, secure, and centered without loosening. If you notice any sway or slipping, retake the test and fix those issues before your commute. Catching problems early ensures a smoother, safer ride later. Similar to a DIY kayak roof carrier, verifying that your homemade gear stays firmly in place under stress avoids dangerous shifting on the road. Always secure your load by checking anchor points against the frame just as you would on a roof rack to prevent load-shifting during sudden turns or stops. For a more reliable setup, consider studying top motorcycle trailer reviews to understand how professional gear distributes weight under load.