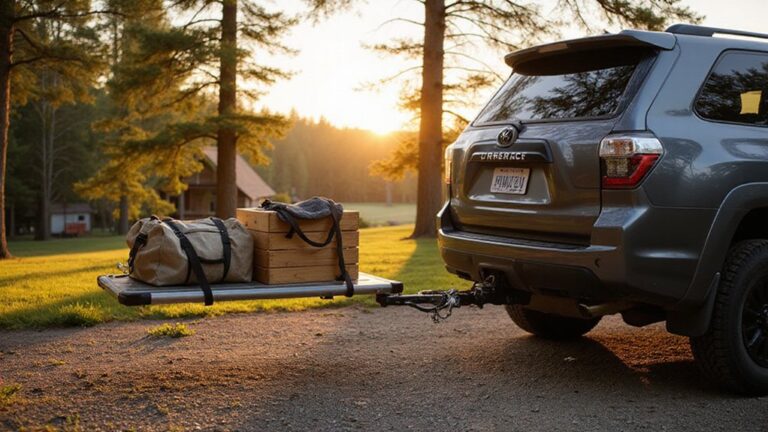
DIY Receiver Hitch Bike Rack: Weld-Free Build Guide
Building a hitch-mounted bike rack without welding might seem tricky, but it’s definitely doable with basic tools and some simple materials. The key is measuring accurately, choosing the right fittings, and reinforcing for stability.
Once you understand these steps, you can create a sturdy rack that fits your bike and vehicle perfectly.
Keep reading to see how to get it done safely and effectively.
Why a Weld-Free Hitch Rack Is Easier Than You Think
A weld-free hitch rack is easier to install and customize than you might think. These racks use bolt-on, no-weld designs that require minimal tools and skill, making them a practical choice for DIY projects. Instead of welding equipment and lengthy setup, you can rely on basic hand tools and hardware to assemble the rack. The process involves dry-fitting parts to check alignment and making adjustments before tightening, so there are no permanent joints you might regret later. Utilizing scrap material helps minimize both cost and waste during construction. When selecting a design, consider features like furniture dollies that can simplify moving heavy items during the build process. Many of these collapsible folding wagons demonstrate a similar bolt-together convenience for transporting gear. Assembling the rack with hardware and adjustable brackets ensures a secure fit without any permanent alterations to your vehicle.
Material corrosion is also less of a concern since you can treat or paint individual components before assembly. This allows for easier color matching and a more personalized look through spray or powder coating. Bolt-on racks often match the strength ratings of welded options, so you don’t sacrifice durability. Before final installation, testing the fit on your vehicle helps identify any needed hardware swaps, eliminating the need for cutting or re-welding. Overall, a bolt-on design simplifies the building process without compromising performance.
Receiver Sizes for Your Weld-Free Hitch Rack Build
The most common receiver sizes for your weld-free hitch rack build are 1-1/4 inch and 2 inch. The 1-1/4 inch opening is suitable for lighter loads and smaller racks, but it limits stability and capacity because it can’t handle as much leverage without wobbling. The 2 inch receiver offers greater compatibility with heavier racks and provides more stability for larger loads, making it ideal if you plan to carry multiple bikes or heavier gear. Stick with the receiver size that matches your vehicle’s hitch class to avoid compatibility issues. Generally, unless your vehicle already features a heavy-duty hitch, you won’t need to consider larger sizes like 2-1/2 inch or 3 inch, which are typically reserved for commercial or off-road use. For instance, a Class 4 hitch can support up to 10,000 lbs. GTW, far exceeding the needs of a bike rack. If you are debating between lighter options, a Class 3 hitch typically handles up to 8,000 lbs., which is more than enough for most bike racks. To keep your hardware organized, use ratchet strap storage with a wall-mounted reel to prevent tangles and save space. Determining the right number of wheelbarrows in a yard ensures you can accurately estimate material volume for compacting or hauling on uneven terrain.
Measure Your Hitch Opening and Depth First
Measuring your hitch opening and depth before building your rack is essential for a proper fit. Start by measuring the inside-to-inside width and height of your receiver opening. Common sizes are 1.25 inches, 2 inches, 2.5 inches, or 3 inches, and knowing this ensures compatibility with your rack shank. Next, insert a ruler from the hitch pin hole to the first obstacle, such as a backstop or bumper. This measurement determines your rack’s depth, which must be sufficient for the insert to seat fully without bottoming out. Accurate measurements help guarantee that your rack materials match the receiver size and inform secure fastening techniques. Don’t skip this step; mismatched dimensions can lead to wasted time, materials, and a rack that simply won’t fit. Additionally, check clearance behind the receiver—especially if you have a spare tire—so your rack can sit properly without interference. For those who also carry kayaks, consider how SUV kayak carriers mount to the same hitch type to ensure your build leaves room for future accessories. Always measure first, then build with confidence. Use ratchet straps to secure your load after installation, ensuring the rack stays tight and stable during transport. For even heavier loads, a yard cart compatible with your hitch can provide additional hauling capacity for lawn equipment.
Steel, Bolts, and Adapters for a Strong Weld-Free Rack
Steel tubing, bolts, and adapters are your main structural components when skipping welding. Select solid steel or welded steel receiver tubing rated for at least 200 lb tongue weight, matching your 2-inch by 2-inch hitch opening. Use Grade 8 hardware for all bolting: four 1/2-inch bolts for custom mounts. Tighten U-bolts in sequence, following the torque specifications: 30 foot-pounds dry, then 60 foot-pounds dry. Adding flat washers and lock washers helps maintain clamp load and prevents loosening over time. For maximum rigidity under heavy loads, consider reinforcing the main beam with a diagonal brace that mimics the top-heavy duty utility carts frame design. This receiver is designed for 4-4.5 bumper trailers and requires at least 1-inch space between bumper and trailer before installation. Install an anti-rattle bolt at the receiver to eliminate wobble and ensure stability. Secure the rack shank with a 5/8-inch hitch pin for added security. For corrosion resistance and easier cable management, opt for powder-coated or zinc-plated steel finishes. These finishes also help reduce snag points, keeping your setup neat and protected. Always ensure you stay within the load limits of the lowest-rated component in your assembly for safety. Understanding the main parts of an appliance dolly can inform how you distribute weight and secure loads on your rack for balanced transport. Reviewing top cargo carriers for hitch can help you identify reliable load-rated dimensions and finish options to replicate in your build.
Match Your Bike’s Wheelbase to Your Rack Design
Your bike’s wheelbase is the key measurement for matching your rack design. Measure the distance from axle center to axle center with the fork straight ahead, not the tire footprint. Modern enduro mountain bikes often have a wheelbase of 1,250 mm or more, while road bikes typically sit near 1,000 mm. When selecting a rack, ensure its tray length accommodates your longest bike. Longer wheelbases require more fore-aft clearance, especially for tire space and frame compatibility. Remember, wheelbase varies with frame size, so check both the model and size. Also, leave extra room beyond the measured wheelbase for axle clamps and wheel stops. A tray that is too short risks placing the bike’s axle mounts too close to the ends, which can compromise stability and safety during transport. For accurate axle spacing, use the same approach as measuring a wheelbarrow tire to ensure precise placement. For added guidance, consult top adult tricycles for examples of how wheelbase affects rack compatibility.
Choose No-Wobble Bolts and Lock Nuts for a Tight Fit
No-wobble bolts and lock nuts are essential for ensuring your rack remains stable during transport. The bolt’s shoulder must pass through the receiver wall and press against the hitch insert, creating a secure clamp. Before tightening, align the holes on your rack base with those on the receiver to avoid misalignment. Use a wrench to tighten the bolts to the recommended torque; this compresses the rack firmly and eliminates any movement. Adding lock nuts or washers prevents vibration from loosening the hardware, especially on rough roads. For two or three bike racks, the rack works on both 2-inch and 1¼-inch hitch openings, so confirm your receiver size before selecting the bolt. However, if you plan to carry heavy bikes or multiple loads, be aware that the weight limits for a 2-inch receiver typically range from 5,000 to 10,000 pounds, while smaller 1¼-inch receivers support far less.
Keep in mind that different receiver sizes require different bolt diameters—typically, a 1.25-inch receiver uses a 3/8-inch bolt, while a 2-inch receiver needs a 1/2-inch bolt. Some racks may require removing filler plates first to access the mounting points properly. Achieving a snug, wobble-free installation not only boosts stability but also reduces stress on the rack and vehicle during transit.
Calculate Weight Limits for Rack, Hitch, and Vehicle
The safe weight limit for your rack setup is determined by the lowest rating among the rack capacity, hitch tongue weight, and vehicle’s maximum tongue weight. First, identify these three ratings. Then, add up the weight of your empty rack, all bikes, including e-bike batteries, and any accessories such as cargo trays. Compare this total to each of the ratings. The smallest of the three values sets the maximum safe weight you can load without risking damage or unsafe conditions. Always stay below this limit to ensure safe transportation. For reference, a four-wheel platform design offers more stability and higher load capacity than standard two-wheel wheelbarrows. Ensure your hitch receiver is properly secured with a bolt and pin to prevent any movement during transit. For sandy beach outings, you can improve stability by choosing a model with wide balloon tires that prevent the wagon from sinking into soft terrain.
5 Weld-Free Rack Mistakes That Damage Your Hitch and Bike
Loose attachment hardware is a common mistake that can cause your bike rack to shift and wear down your hitch receiver and shank. Always check and tighten pins and bolts, especially during fuel stops or when hitting rough roads. This ensures the rack remains secure and prevents unnecessary stress on your hitch components. Neglecting this can lead to a loose fit, which increases the risk of damage over time and compromises your bike’s safety during transit. Regularly inspecting and tightening hardware helps maintain stability and prolongs the life of your hitch system. Treat this maintenance like the routine tool checks that keep a DIY cart’s casters and frame bolts snug, preventing wobble and premature wear. Just as a ratchet strap requires a secure anchor point to avoid slipping and cargo damage, your hitch rack depends on a firmly locked shank to prevent movement and protect both bike and hitch.
Test Solid Engagement in the Receiver Before Riding
To ensure the rack is fully engaged in the receiver before loading bikes, perform a solid engagement test. Insert the shank until the pin holes align cleanly, then tighten the hitch bolt or anti-rattle device completely. Move the rack up and down to check for play; if it wobbles, tighten further. Confirm the shoulder of an anti-rattle pin is fully inserted, preventing movement. Use the included 5/8-inch pins for a secure fit in standard receiver openings.
Lock the rack against shifting using the supplied pin, clip, or knob. Check that the bolt orientation matches the rack’s design, ensuring proper fit. Conduct a manual shake test by slightly lifting the rack to detect any wobble or side-to-side play. If movement persists, tighten again until secure.
Run a short drive without bikes to listen for rattles. If you notice any shifting or noise, stop and retighten the hardware. Recheck the fit before each ride—tighten once more if side-to-side play reappears. This routine maintains bike security, prevents damage from loose connections, and helps preserve the rack’s appearance over time.
Adjust Clearance for Bumpers, Doors, and Storage
To ensure your rack fits without scraping, measure from the center of the hitch pin hole to the furthest rear point of your vehicle, including bumper edges and bodywork—not just the hitch receiver. Match your tray offset to this actual profile, not just the published hitch-only specs. Remember to account for rack flex under load; leave extra space beyond the bare minimum to prevent contact when the rack is weighted.
Plan for door and storage access as well. A swing-away hinge allows the tailgate or hatch to open fully, so you can unload bikes and access gear without removing them. Check that the swing path covers handlebars and pedals, not just the frame, to avoid blocking access. Rack height also influences the rear envelope; recheck clearance with bikes mounted at different heights. For deeper bumpers, consider using a longer shank or adjustable offset arms. Make sure the fold mechanism and swing parts do not interfere with drawers or fridge slides. Lock everything securely after adjustments to maintain the desired clearance and prevent shifting during travel.