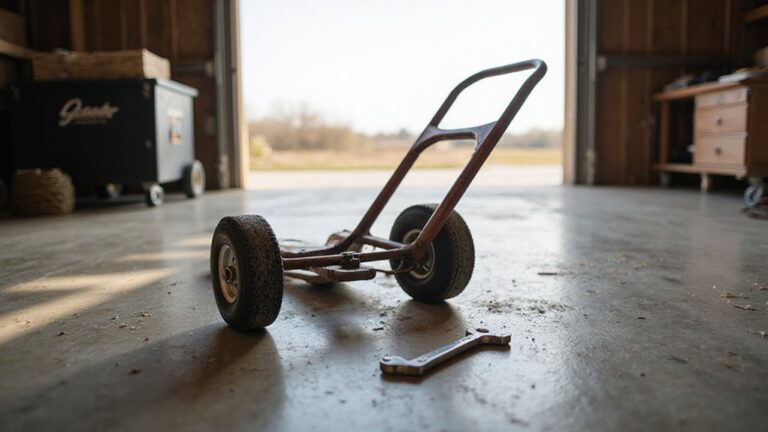
How to Remove Hand Truck Wheels: Quick & Easy Steps
Wondering how to remove a hand truck wheel? You might be surprised at how straightforward it can be with the right tools and steps.
Whether the wheel is stuck or held in place by different fasteners, knowing what to do will get you the job done quickly. Keep reading to learn the simple process for swapping out those wheels comfortably and safely.
Identify Your Hand Truck’s Wheel Fastener Type
To identify your hand truck’s wheel fastener type, examine the assembly carefully. Push nuts are domed caps with inward-facing teeth that you pry off with a flat tool. Cotter pins or hairpin clips show bent split legs passing through the axle; you straighten the legs first before withdrawing them. Nuts and bolts have identifiable hex heads, requiring a socket or wrench of the correct size to remove. Castle nuts feature a slotted crown, so you must remove the cotter pin before unscrewing. Press-fit hubs do not have any external hardware; instead, the wheel is held tightly by a friction fit, requiring a puller to remove it. Always verify the end of the axle shaft before attempting removal and do not assume the fastener type. Proper identification of the fastener ensures you select the right tools, prevents damage, and makes the removal process smoother. For a heavy-wheeled hand truck, consider using a roof top carrier to transport the disassembled parts if needed. Rubber-coated handles on replacement pins improve grip and insulation, which is useful when working on axle assemblies. For added safety during the process, refer to a final safety check to confirm the axle is fully secured before testing the hand truck. If your hand truck uses push nuts, consider reviewing a top-rated furniture dolly for easier transport during future moves.
Position Your Hand Truck on Its Side for Safety
To safely position your hand truck on its side, start by identifying the wheel fastener type. Then, lay the hand truck fully on its side on a flat, stable surface. Make sure the area is free of slopes and clutter to prevent rolling or shifting. Confirm that the load has been removed or is fully stabilized before tipping. An appliance dolly typically includes a nose plate and straps to secure heavy loads during transport. Orient the wheel fastener area upward to allow easy access for removal or maintenance. For heavy-duty models, consider features from Best Yard Carts for Lawn Mowers that emphasize durable wheel construction. Support the handle side to prevent the hand truck from rocking. Keep the wheel end clear of walls or obstacles to allow room for tool movement. Before touching any hardware, check that the hand truck is stable: test for rocking, reposition if the frame shifts, and ensure the wheel side cannot move when loosening fasteners. Always keep your hands away from pinch points and the axle until the hand truck is completely stable. To further protect the frame during maintenance, place a padded block under the handle side to match the load capacity of the original axle support.
Gather the Right Tools for Wheel Removal
Gathering the right tools is essential before attempting to remove a wheel from your hand truck. Start by identifying your wheel’s fastener type to know what tools you’ll need. For pins, needle-nose pliers are the best choice, while a flat-head screwdriver can pry off push nuts. Use the correct wrench or socket set for axle bolts to ensure proper fit and leverage. Always wear work gloves and safety glasses to protect against dirt, debris, and unexpected snaps. A hammer or rubber mallet can help free stuck parts without damaging the hardware, and a push-nut remover is useful for stubborn retainers. Keep a clean rag handy for wiping dirt away and a lubrication spray to prevent hardware from seizing. To stay organized, use a small container for screws, nuts, and other small parts. For heavier assemblies, a 3-jaw puller can make removal easier. A flashlight helps spot hidden fasteners, especially in dark or hard-to-see areas. Proper tool preparation ensures a smoother, safer wheel removal process and makes future maintenance or lubrication much easier. For added compatibility, checking mounting hardware alignment ensures the replacement wheel attaches securely without causing wobble or strain. Understanding wheelbarrow capacity in yards can help you gauge how much material your hand truck might transport if used for similar heavy loads. If you frequently travel over sand or soft surfaces, consider a beach cart design with oversized pneumatic wheels for better floatation and easier rolling.
Remove Cotter Pins, Nuts, and Washers From Your Hand Truck Wheel
To remove the cotter pin, nut, and washer securing your hand truck wheel, start by straightening the pin’s split legs with needle-nose pliers. This allows the pin to slide out more easily through the axle hole. Pull the pin free, wiggling gently if it resists—avoid forcing it to prevent damage to the hole. Always replace worn cotter pins instead of reusing them. Next, back off the nut using the appropriate tool and then remove the washer. Keep these parts organized to ensure proper reassembly; incorrect placement can affect wheel alignment and tire pressure. With the hardware removed, slide the wheel off the axle. If it resists, clean off dirt or rust to loosen it, and address any corrosion like seized nuts or washers before installing new hardware. After removing the wheel, clean grease off components before installing new bearings. For easy transport and storage, consider using a collapsible folding wagon to carry your hand truck components.
Pop Off Wheel Caps and Covers to Access the Axle
Pop on caps snap over the axle without any fastener loosening. Clip on covers are released by prying at their edge, while threaded covers are turned off. Flat center caps and more complex designs require different removal techniques based on their shape and retention style.
Place the hand truck on a flat surface and clean dirt from the cap edge to clearly see the retaining lip. Look for notches or seams that indicate pry points. Use a wide-tipped tool, such as a flat screwdriver or trim removal tool, to apply pressure gradually. Start at solid areas and work around the cap in small increments, alternating pressure to avoid cracking or breaking the plastic clips. Gently pry until the cap pops off. Once removed, the axle end becomes visible, exposing a bolt or nut. Applying strong cam straps may help secure the wheel assembly while you work. Proper removal technique is important to avoid damaging the tabs that catch the axle. Carefully set the cap aside, especially if it’s in good condition, to reuse later. For heavy hand trucks, furniture sliders can temporarily assist in moving the unit across carpet without straining the wheels. Treating the axle with a secure locking mechanism after removal can prevent loosening during transport.
Deal With Pressed-On Hand Truck Wheels Using Oil and Tapping
To deal with pressed-on hand truck wheels using oil and tapping, start by applying penetrating oil generously at the contact point between the wheel and the axle. Cover both sides if possible. Allow the oil to soak in for at least 15 to 30 minutes; longer if rust is heavy. Reapply the oil if the wheel remains stuck. Before applying oil, clean off any loose dirt and rust to ensure the oil reaches the seized interface effectively. Then, use a rubber mallet or a soft-faced hammer—never steel—to tap firmly around the wheel in a full circle, avoiding the rim edge. The goal is to vibrate the corrosion loose while allowing the oil to penetrate deeper. For added leverage, consider using a tow hitch as a stable support to hold the axle in place during tapping. A shop vac cart also relies on a stable platform to support heavy loads during assembly, similar to this method. Repeat the soak and tapping process as needed, maintaining moderate force to prevent axle damage. Always wear eye protection against rust or oil debris, and keep your hands clear of pinch points to stay safe as the wheel eventually breaks free. Similar to changing a wheelbarrow tire tube, removing rust and debris from the contact point is essential before applying new parts to ensure a secure fit.
Loosen a Stuck Hand Truck Wheel Without Damaging the Axle
To loosen a stuck hand truck wheel without damaging the axle, start by securing the hand truck on a flat surface to prevent it from shifting. Support the frame to keep the hardware accessible and ensure the wheel remains properly aligned during removal. Identify the fastener—such as a cotter pin, snap ring, or nut—and remove it with the correct tool, like pliers or a wrench. Gently work the wheel side to side while rotating it to ease it off the axle. If the wheel resists, apply penetrating lubricant to the hub and axle interface and wait a few minutes for it to penetrate. Tap the wheel hub lightly with a rubber mallet, never striking the axle itself, to free any remaining corrosion or debris. When dealing with heavy rust, a wheelbarrow tire repair approach that uses a penetrating soak and careful tapping is equally effective for hand truck wheels. Use controlled outward pressure rather than prying directly against the axle shaft. If the wheel still refuses to budge, stop and avoid excessive force, as forcing it can damage the axle, leading to costly repairs. Taking this careful approach helps extend the life of your hand truck and prevents unnecessary damage. For a severely rusted wheel, a custom puller using a trucker chain and bottle jack can generate the force needed without risking axle damage. Inspecting the axle and bearing surfaces for wear before reassembly ensures the new wheel will roll smoothly and last longer. Choosing a heavy-duty utility cart for your kitchen can prevent similar rust issues by using a more durable wheel assembly.
Inspect the Axle and Bearings After Wheel Removal
Once the wheel is removed, inspecting the axle and bearings is crucial for assessing their condition. Start by checking the axle for any signs of misalignment, such as bending, scoring, or flattened spots, which indicate off-center loading. Examine the end of the axle for impact damage and ensure the retaining hardware threads are intact and not stripped.
Look for surface corrosion or pitting on both the axle and bearing surfaces. Clean the bearings thoroughly, then rotate each by hand. Feel for roughness, grinding, or notchiness, which suggest wear. Check for heat discoloration, cage damage, or increased play, all signs of bearing failure. Inspect the hub bore and races for scoring or cracks. Bearings on all wheels, with both inner and outer types, can develop looseness over time, so check for a clunking or side-to-side movement that indicates play. Accurate measurement of the axle’s diameter is essential to ensure any replacement caster wheels match the existing hardware.
Measure the movement side-to-side and up-and-down. A snug, free-spinning fit shows proper installation, while noticeable looseness indicates excessive wear. Record any damage patterns before reassembling. Replace bent axles, corroded or pitted bearings, and deformed support parts. After replacement, recheck to confirm smooth and stable rotation.
Slide the New Hand Truck Wheel Onto the Axle
To slide the new hand truck wheel onto the axle, first verify that the axle diameter matches your replacement wheel, typically 1/2 inch, 5/8 inch, or 3/4 inch. Ensure the hub bore aligns properly with the shaft for smooth installation. Keep the wheel level and approach the axle straight on to prevent binding and ensure proper alignment. If the hub doesn’t slide on easily, stop and check that the bushing or bearing size is correct. Push the wheel onto the axle with steady, even hand pressure until it fully seats against the axle shoulder or washer stack. Do not force the wheel, as excessive resistance indicates a mismatch. For pneumatic wheels, position the tire tread so the valve stem faces outward, as intended. Make sure to preserve any washers in their original order during installation. When the wheel sits flush with no gaps, it is ready for securing.
Test Your Hand Truck Wheel on a Flat Surface
After securing the new wheel, place the hand truck on a level, hard surface and roll it a short distance to check if it tracks straight. Observe for side-to-side drifting; if the wheel pulls, the alignment is off. Listen closely during wheel rotation—grinding sounds indicate bearing issues, often caused by worn bearings instead of a bent axle, which can be replaced rather than buying new wheels. Check for any wobbling, which could suggest a bent axle. Spin each wheel by hand to verify it moves smoothly without hesitation. Look for uneven wear patterns or flat spots that could cause bumps as you roll. Both wheels should contact the ground evenly, with no gaps or gaps. If you experience vibrations on smooth flooring, the tire’s contact patch may be uneven. Always perform a load test by placing weight on the hand truck and rechecking wheel movement. Stop immediately if the wheel feels loose or binds, as this indicates further adjustments are needed.