How to Use a Bicycle Rear Rack: Loading & Safety Tips
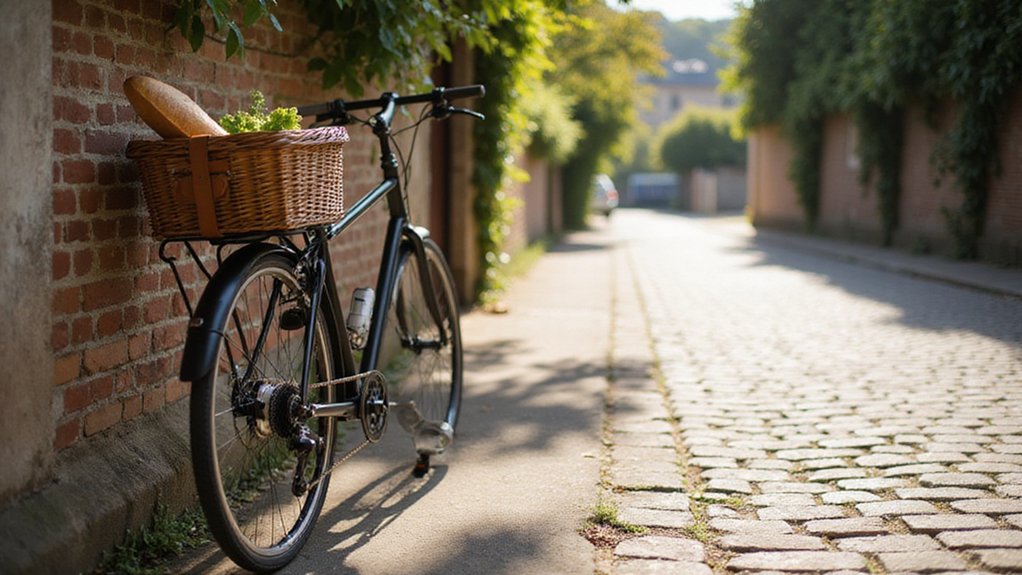
Figuring out how to load your bicycle rear rack safely can feel tricky—especially when balancing weight, stability, and safety.
The key is knowing how much your rack can handle, how to position your gear, and how to secure it properly.
With these tips, you’ll be able to carry your cargo confidently without risking damage or imbalance.
Keep reading for all the essential details.
How Much Weight Can Your Rear Rack Actually Hold?
Your rear rack’s actual safe load depends on its mounting, material, and your bike’s carrier limits. Most commuter racks support around 20 to 30 kilograms, while heavy-duty touring racks can handle between 45 and 55 kilograms. Seatpost-mounted racks typically have lower weight limits, usually 8 to 12 kilograms, so always check your frame mounts first. Never go beyond the rated capacity listed on the rack, and use whichever is lower — the rack’s limit or your bike’s carrier specification. Aesthetic factors such as rack color matching your bike matter, but safety should take priority over style. Light utility loads are generally near 25 kilograms, whereas expedition gear can push the limit over 40 kilograms. Be cautious of unusually high capacity claims unless they are properly documented. Confirm whether the rating covers just cargo or includes accessories, and load accordingly to stay safe. For heavy items, consider using a furniture dolly to assist with ground-level transport instead of relying solely on your bike rack. For trucks transporting heavy cargo, ratchet straps provide secure load binding beyond what elastic cords can offer. In trucks, bed extenders can similarly help secure long loads that overhang past the tailgate.
Where to Place Heavy Gear on Your Rack for Stability
Place heavy gear on the rear rack so that the heaviest items are positioned closest to the bike’s centerline and lower on the rack. Keep dense objects on the deck rather than stacking them high, as this lowers the center of gravity and enhances stability. Position the heaviest gear toward the front of the rack, near the frame and rider’s seat, to maintain better steering control. Avoid placing heavy cargo far behind the rear axle, as this shifts weight to the rear and can make steering less precise. Instead, center the load over or slightly ahead of the axle for balanced weight distribution. Ensure that weight is evenly split between both sides by sharing dense items across panniers. Keep top-heavy or bulky items on the upper rack for safety, reserving the platform space for lightweight or large objects. For securing these loads, using bungee cords with balls can provide reliable tension and quick attachment. Proper placement of heavy gear helps keep your bike predictable, stable, and safe during rides. Knowing the ideal capacity per trip can help you gauge how much dense cargo to split between sides. Selecting ratchet straps can further enhance cargo security with their adjustable tension and durable hold.
The Best Ways to Secure Cargo So It Doesn’t Shift
To prevent cargo from shifting during transit, use at least two straps crossed in an “X” pattern. This method helps resist side-to-side sway and twisting. Always thread straps flat—twisted webbing loosens under vibration and can compromise tension. Pull straps snug enough to prevent any movement when shaken, but avoid over-tightening to prevent crushing your gear. For demanding loads, consider the trade-offs between polyurethane vs rubber caster wheels, as material hardness affects load stability and wear. For hitch-mounted carriers, a class 3 receiver offers a solid balance of towing capacity and compatibility for most users.
Attach straps to fixed rack bars rather than fenders or wires, as these provide more stability and prevent shifting. Route the straps so they pull against the cargo rather than across loose edges. Tighten the straps gradually, rechecking tension after your first short trip. Secure any excess strap tail to prevent it from flapping loose and unwinding. If choosing a vehicle hitch for heavier loads, consider class 3 vs class 4 receiver hitches, as capacity and stability differ significantly.
For boxes, combine top compression straps with side restraints for extra security. Before setting off, give the load a good shake to ensure stability. Any movement at rest will only worsen once you start driving. Properly securing your cargo makes a significant difference in safety and prevents damage to your gear.
Keep Bags Clear of Wheels and Brakes Before You Ride
Keep Bags Clear of Wheels and Brakes Before You Ride.
Ensure your bags are kept clear of wheels and brakes before riding. Verify that no part of your bags drifts into the rear wheel or brake components, especially during bumps or suspension compression. Panniers should sit high enough so they don’t touch the tire when riding over uneven terrain. Tighten any loose straps or cords that could catch the wheel as you pedal. For those who need to haul heavy loads without risking bike interference, a garden cart with seat offers a stable alternative for ground transport. If you require a versatile towing option for heavier yard equipment, a high-capacity lawn cart can similarly move large loads without affecting your bicycle’s balance.
Spin the rear wheel by hand to check for clearance. The wheel shouldn’t brush against any bag fabric or hardware, which could cause damage or interfere with your riding. Focus particularly on brake compatibility: if your bike has disc brakes, make sure your rack and panniers do not interfere with the caliper or rotor. Wrong-rack legs or hooks can reduce braking effectiveness or cause contact during normal riding.
Inspect both sides of the wheel to confirm that the bag hardware does not touch rotors or calipers, no matter the wheel’s position. Compress the load as if going over bumps; this test reveals any sagging that might cause parts to contact the wheel unexpectedly. Regularly check that pannier hooks fit tightly onto your rack’s tubing, typically between 8 and 16 millimeters in diameter. For heavy or oddly shaped loads, consider using a collapsible folding wagon for ground transport instead of overloading your bike. After loading, give the bags a shake—if they slide or shift, your mounts need adjustment. Recheck clearance after any cargo shift, as even small sagging can result in contact or sudden interference during your ride. Fix any disc-brake interference issues before you start cycling to avoid problems mid-ride.
How Extra Rear Weight Changes Your Riding and Handling
Adding extra weight to the rear of your bike instantly alters your handling. The steering becomes slower and less responsive because the front tire loses some traction. When you load your panniers or cargo behind, roughly 60-70% of the weight shifts to the rear, making the handlebar feel lighter during turns. Climbing hills and accelerating take more effort as the additional load resists movement. However, a centered load can help you stay grounded on steady grades. For secure attachment without traditional hardware, hookless strap tension keeps your cargo firmly in place against the rack. Building a DIY PVC beach cart can provide a versatile alternative for hauling gear, though its design requires careful weight distribution to avoid handling issues.
Braking is more complicated with added rear weight. Heavy panniers can cause the rear wheel to unload quickly if you brake abruptly, increasing the risk of skids. Cornering also becomes less nimble because extra cargo increases yaw inertia, making direction changes sluggish. To maintain stability, keep the weight low and close to the axle and pack evenly side to side. Balanced packing reduces stress on your racks and improves overall control, making riding safer and more predictable. For those needing a canopy for cargo protection, ensure the added wind resistance is factored into your stability checks, as noted in quality gear comparisons.
8 Common Loading Mistakes That Can Damage Your Bike or Rack
To prevent damage, it’s essential to load your bike properly. Never exceed your rack’s weight limit, as overloading can stress the rack material and lead to failure, especially on seatpost-mounted racks. Distribute the weight evenly across the rack; concentrating it on one side puts extra strain on attachment points and can cause panniers to sway. Always secure cargo tightly with proper straps to avoid shifting, which can throw off your balance or get caught in wheels. Check that your bags have enough clearance from tires, spokes, and brakes so they do not rub or cause issues while riding. Avoid stacking items tall enough to raise your center of gravity, which can compromise stability. Use the right rack for your specific bike model to ensure a proper fit—misaligned hardware creates uneven stress and risks damage. Be cautious not to over-tighten bolts, as this can crush mounting points or damage the rack and frame. For heavier loads, split weight between front and rear racks, placing the heavier items low and close to the frame to minimize leverage and improve stability. Using high-quality straps, such as those with retractable ratchet mechanisms, ensures cargo stays secure and simplifies adjustments. For optimum security, look for cam straps that offer a tight, tool-free grip and resist loosening from vibration. When loading a heavy item, consider building a small wooden platform to evenly distribute the weight across the rack surface.
When to Inspect Your Rear Rack Bolts and Mounts?
Inspect your rear rack bolts and mounts immediately after installation and your first ride. Fasteners settle as they break in, so checking early ensures everything is secure. After that, re-torque critical bolts quarterly. For routine use, perform monthly inspections. If you’re undertaking heavy touring or riding rough roads, check every two weeks—especially after potholes, wet conditions, or crashes. The frame material matters because it influences bolt compatibility and corrosion resistance. Don’t rely solely on visual clues; a finish can hide loosening. Always immediately inspect if you hear rattling, see wobbling, or feel sway. Use a wrench to confirm bolts are snug; never over-tighten as it can damage threads. If hardware is stripped or missing, stop riding immediately and replace it to prevent damage or accidents. Cam straps versus ratchet straps provide different security levels for securing loads, so choose the type that best matches your cargo and rack setup.
Choose the Right Panniers, Straps, Nets, or Bungees
When extra flexibility is needed, the durability of straps becomes essential. Opt for straps with strong hooks that lock securely onto your rack and resist slipping during transit. Adjustable-length straps allow you to tighten or loosen them around odd-shaped loads, helping prevent damage or crushing. Cargo nets are ideal for loose items like jackets or small accessories—they stretch easily for quick coverage and removal, with a 200% extendable design that can accommodate both small and large items. For heavy or bulky loads, applying the same principles used in a DIY garden cart can improve stability and weight distribution. Bungees with metal hooks are a fast solution for light loads, but avoid over-stretching them, which can compromise their hold. Always secure loose ends away from spokes, brakes, or your legs to ensure safe and stable riding.