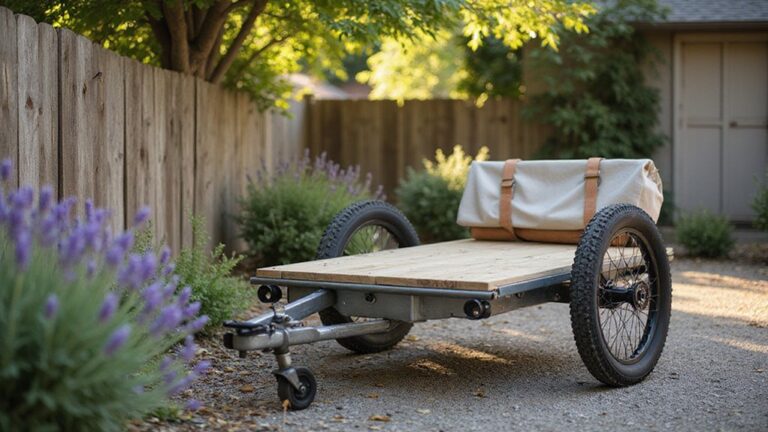
DIY Bike Dog Trailer: Build a Safe Pet Hauler
Thinking about building a safe DIY bike dog trailer? It’s possible to create a sturdy and pet-friendly hauler that keeps your furry friend comfortable and secure during rides.
With the right low, enclosed steel frame, puncture-resistant tires, and good airflow features, you can design a trailer tailored for safety and durability.
Keep reading to see how to make it both easy and reliable.
What Makes a Dog Bike Trailer Safe for Your Dog?
A dog bike trailer is safe when it has a secure hitch that stays steady during turns and braking. The hitch should fit tightly to prevent wobbling and ensure stability. An internal restraint—preferably a harness rather than a collar—is essential to keep your dog secure and prevent neck injuries if you brake suddenly.
Check that the trailer’s rear door remains shut to prevent escapes during rides. The enclosed design should sit low to the ground, which improves stability and decreases the risk of tipping if the bike falls over. For off-road or trail use, choose trailers equipped with wide, puncture-resistant tires to handle uneven terrain better and reduce the chance of flats. For indoor use, you can also use furniture sliders for wooden floors to easily move the trailer when parked.
Roll bars add an extra layer of crash protection in case of a rollover or collision. Visibility is crucial for safety; attach reflectors and a brightly colored safety flag so drivers can see you from a distance. Ensure the trailer has good ventilation with mesh windows to allow airflow and prevent overheating, especially on warm days. Distributing cargo weight evenly across the trailer’s platform, similar to how you would load a rear rack, further stabilizes the ride and prevents sway. You can also use a furniture dolly to easily reposition the trailer on flat surfaces without lifting.
Throughout the ride, monitor your dog’s behavior for signs of overheating or distress. Providing water breaks is vital for hydration. Before every ride, perform a thorough check of tire pressure and hitch connections to keep everything secure and functioning correctly.
Plan Your DIY Dog Trailer’s Size and Weight Limits
Determine the appropriate size and weight limits for your dog trailer first. The interior length should comfortably allow your dog to lie fully extended, with a few extra inches for comfort. Width needs to be wide enough for your dog to turn around without contacting the walls, typically about 1.5 times their shoulder width. The height must clear your dog’s head by several inches in a seated posture to prevent discomfort or injury. Remember to include extra space for harness adjustments and seasonal coat insulation, as bulkier gear may require more room. For added stability, consider how top cargo strap choices can secure the load effectively. For heavy loads, consulting ratchet strap reviews can help you choose durable tie-downs.
Weight limits should account for both your dog’s weight and the trailer’s own weight. A conservative approach works best—many commercial trailers cap around 30 to 100 pounds. The total weight limit must not be exceeded to ensure safety and durability. Keep the tongue weight at about 8 to 12 percent of the total load, as this helps prevent sway during movement. To achieve balanced load distribution, position heavier items slightly forward of the axle. Lastly, check that the trailer’s width fits through standard doorways, paths, and obstacles to avoid clipping or getting stuck.
Build a Safe Dog Trailer Frame That Won’t Fail
Once you’ve determined your trailer’s size and weight limits, building a strong, reliable frame becomes your top priority. Use steel tubing because it welds predictably and offers the strength needed to support your dog safely. Avoid thin-walled tubing, which can fail at weld points under stress. Frame reinforcement is also critical: add crossmembers at strategic points to minimize flexing and ensure forces are transmitted through continuous load paths rather than weak joints. Proper reinforcement prevents unexpected failures during use. For maximum safety, consider how top cargo boxes distribute loads across a hitch to inform your own frame’s load path design. Selecting wheels with durable pneumatic tires ensures your trailer can handle varied terrain without compromising stability. Additionally, secure your dog’s crate to the frame using high-strength cam straps that maintain tension during sharp turns and sudden stops.
Pay close attention to welding techniques: clamp pieces square on a flat surface, verify measurements from corner to corner, and keep metal surfaces clean before welding. Sharpen your skills to produce consistent, strong welds. Avoid sharp corners, as they concentrate stress and are more prone to cracking; instead, design with smooth, rounded transitions. Keep high-stress beams free of holes, which can introduce stress risers.
Inspect every weld carefully. Look for signs of incomplete fusion, cracks, or spatter, as these weaknesses compromise the frame’s integrity. Poor weld appearance often indicates areas prone to failure. Use tack welds sparingly and only in low-stress areas to hold parts in place during welding. Your dog’s safety depends on building a frame that resists fatigue, avoids crack initiation, and maintains strength over time.
Pick Wheels, Hitch, and Non-Slip Flooring
Choose 16-inch air-filled tires for smoother rides on uneven surfaces. Ensuring the tire pressure matches the sidewall specifications is crucial for safe and reliable performance. Regularly maintain your wheels by tightly seating each wheel onto the axle assembly and confirming full insertion before every ride. Properly installed wheels reduce the risk of accidents and improve the trailer’s stability during travel. Choosing stable wheels helps prevent tipping when hauling gear in sandy or soft ground. For even greater stability, consider a four-wheeled design that distributes weight more evenly and reduces the risk of tipping. A commercial model like the Sepnine Dog Bike Trailer includes a non-slip floor to further prevent pets from shifting. For added security, consider a model that features a safety chain to attach the trailer frame to the truck’s hitch receiver in case of a mechanical failure.
Enclose the Cabin With Vents, Doors, and Mesh
Enclosing the cabin with vents, doors, and mesh involves carefully considering safety, ventilation, and durability. Start by installing large mesh panels on the front, sides, and top to promote effective cross-ventilation, which helps reduce heat buildup on hot days. Use tightly woven mesh materials that prevent paws or noses from slipping through, ensuring durability against chewing and scratching. A rear door secured with a latch keeps your dog contained while the vehicle is in motion; adding a harness tether inside prevents escapes when opening the door. Incorporate zipper-secured openings for extra closure and optional roll-down covers to shield against weather elements while still allowing airflow. For heavy loads or frequent stair access, consider using a stair-climbing hand truck to simplify moving the trailer up and down steps. Prioritizing these features creates a well-ventilated, safe, and visible environment for your pet during travel. For easier loading, consider a dolly with pneumatic tires for better stability on uneven ground. A collapsible folding wagon can also serve as a versatile base for this type of DIY trailer project.
Train Your Dog to Ride Calmly in the Trailer
Begin by walking your dog alongside the trailer without attaching it to the bike. Focus on reinforcing calm behavior by offering treats and praise whenever your dog remains still and relaxed. Keep these walking sessions short, around 5 to 10 minutes, and stop immediately if your dog shows signs of anxiety, such as pulling, whining, or pacing. Reward your dog for settling quickly and calmly before ending each session. Gradually increase the duration and introduce slow, controlled rides without the bike attached, maintaining the same reward system for relaxed behavior. To further prepare, practice luring the dog into the trailer with high-value treats to encourage voluntary entry. Once your dog consistently stays calm during these walks and slow rides, attach the trailer to your bike for short, low-speed trips. Always monitor your dog closely, and if anxiety or stress reappears, revert to walking and rewarding until your dog is ready for the next step. Understanding the principles of weight distribution helps ensure the trailer tracks smoothly, just as it does for a wheelbarrow. Building a routine where calmness is rewarded creates a positive, predictable pattern that helps your dog associate riding in the trailer with comfort and safety. For budget-conscious builders, adapting a DIY kayak roof carrier approach can provide a sturdy, lightweight frame without requiring expensive welding equipment. Using a secure receiver hitch lock prevents the trailer from accidentally detaching during rides.
Add Reflectors, Flags, and Lighting for Visibility
Once your dog is calm and comfortable riding in the trailer, focus on enhancing its visibility to others on the road. Start with reflector placement: mount a CPSC-compliant red reflector on the rear of the trailer, ensuring it is clear of bags or covers that could obstruct it. Add side visibility reflectors—white, yellow, or orange—on the wheels or side panels; these reflectors improve detection at intersections from multiple angles. For superior visibility, look for top-tier components in the best e bike with cargo models. Attach a bright orange or red safety flag on a flexible pole, positioning it on the traffic-facing side of the trailer. This flag helps drivers spot the lowered trailer above road clutter, especially from a distance. Secure the flag and lighting components using best bungee cords with clips for a reliable hold. In low-light conditions or at night, mount a rear red light on the trailer; pair it with your bike’s front white light. This combination allows drivers to judge the trailer’s width and size more accurately. Always inspect these visibility features before each ride, keeping reflectors clean and flags upright to maintain maximum visibility. For the strongest mounting base, consider an aluminum cargo carrier designed for hitch receivers to securely attach the trailer to your bike.
Maintain Your Dog Bike Trailer With a Pre-Ride Check
Before each ride, perform a quick pre-ride check to ensure your dog trailer is safe and reliable. Start by inspecting the frame for cracks, rust, or bends and make sure all welds and fasteners are tight. Check the wheels to confirm they are securely attached, properly inflated, and free of cuts or wobbling.
Next, verify that the hitch is firmly connected to your bike with no play, and ensure all safety pins are engaged and secure. Inside the trailer, make sure the cabin latch is secure and your dog’s harness fits snugly. Secure all cargo with the built-in storage to prevent shifting during travel. Examine fabric panels for tears and confirm that weatherproofing materials are intact to protect against the elements.
Finally, test your bike’s brakes and gently push the trailer a few feet. It should roll smoothly without rubbing or making noise. Completing a brief walk-around confirms everything is ready for a safe and enjoyable ride.